In the Hourline you can create, save and share different Views that organise your Objects, Users & Resources. Different Views can have different Objects, and different Groupings.
If you are looking how to navigate the Hourline, then please go to our separate Hourline article.
TABLE OF CONTENTS
- Accessing Hourline Views
- Creating A New View
- Saving, Updating or Removing A View
- Using A View From Another User
- Hourline View Mode
- Other Options to Choose On The Hourline Clock Menu
- User Permissions
Accessing Hourline Views
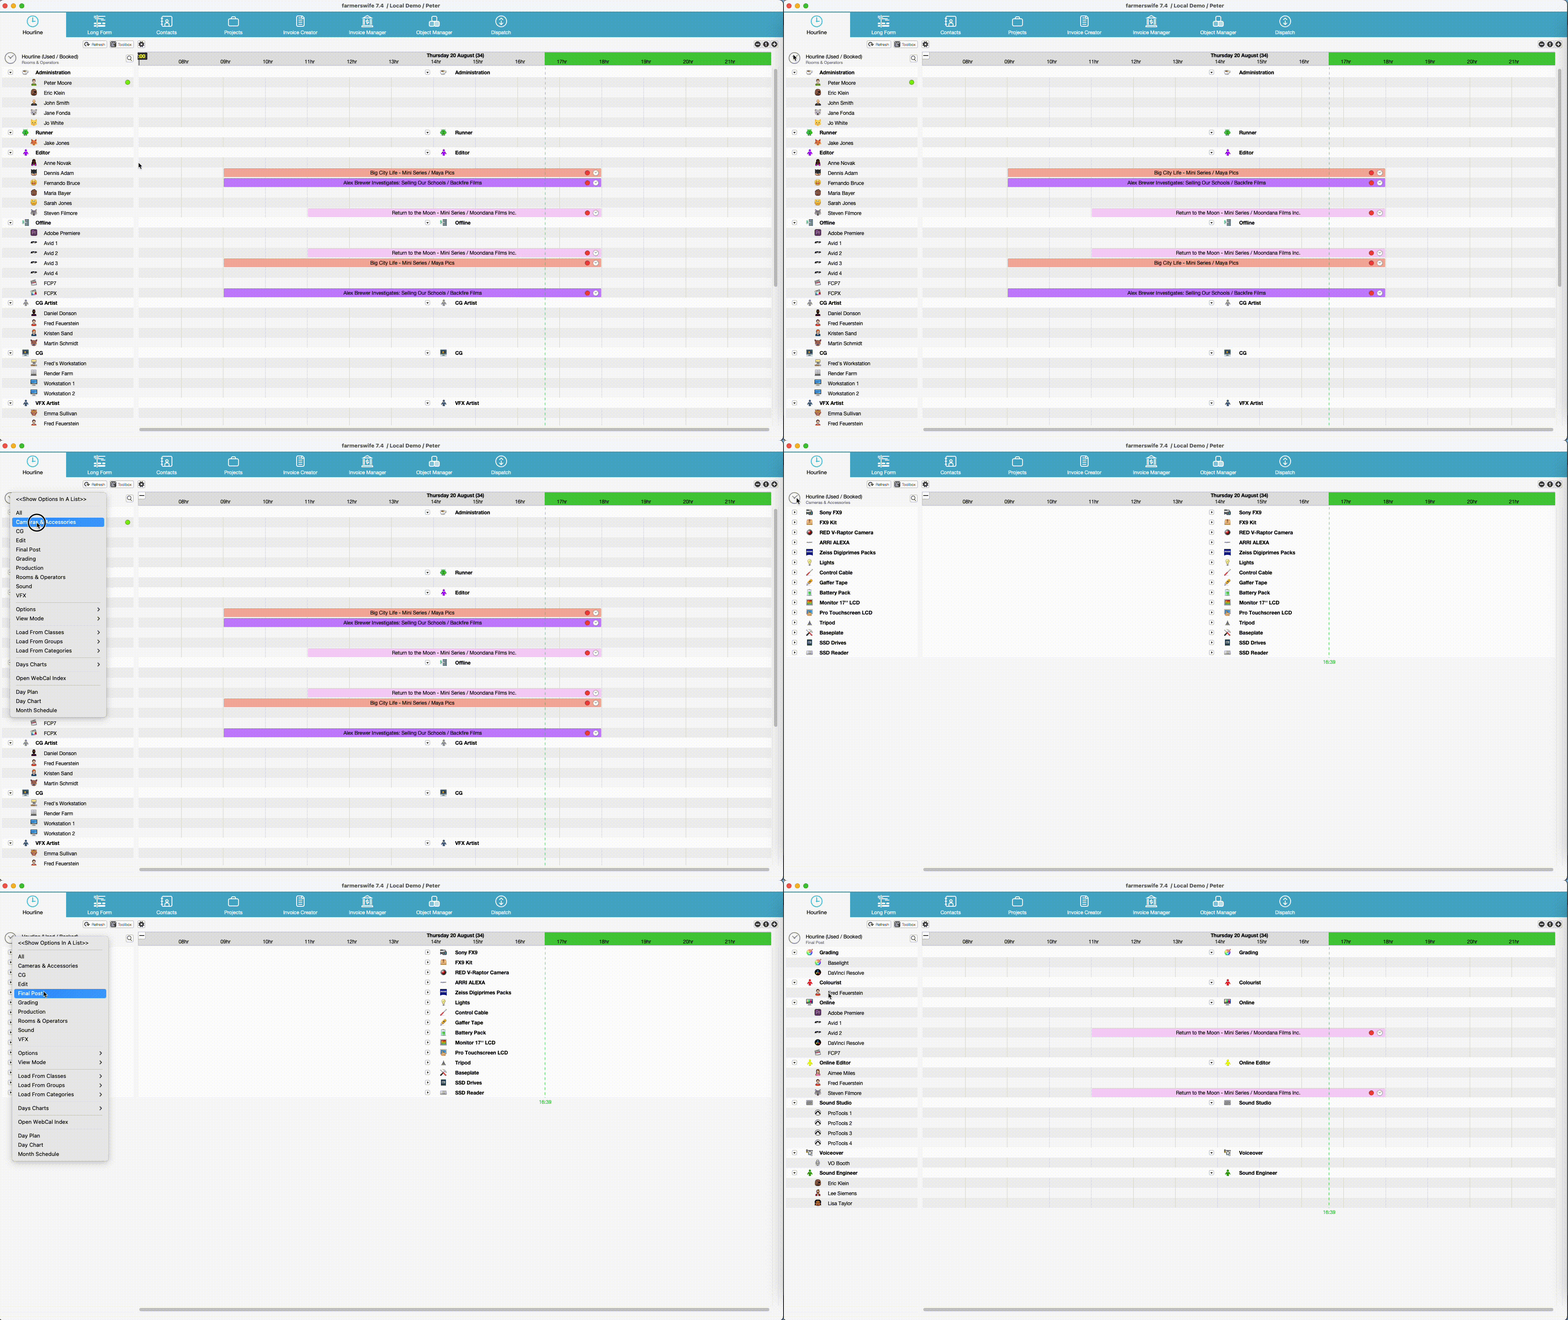
To choose between your Personal and Shared Views, simply click the Clock icon on the Hourline. This will bring up a menu showing the different Views available to you. Any Shared Views will be in a separate section on the menu above any Personal Views.
Once a View is selected, the Objects being displayed on the Hourline will switch to the configuration saved on the selected View. The name of the selected View will also be displayed under the Hourline header, next to the Hourline Clock menu.
Creating A New View
Before creating an entirely new View, you should look to clear the existing Objects loaded into the Hourline. To do this, go to the Hourline Clock menu > Options > Clear View. This will give you a blank canvas to start from.
Loading Objects Into Your View
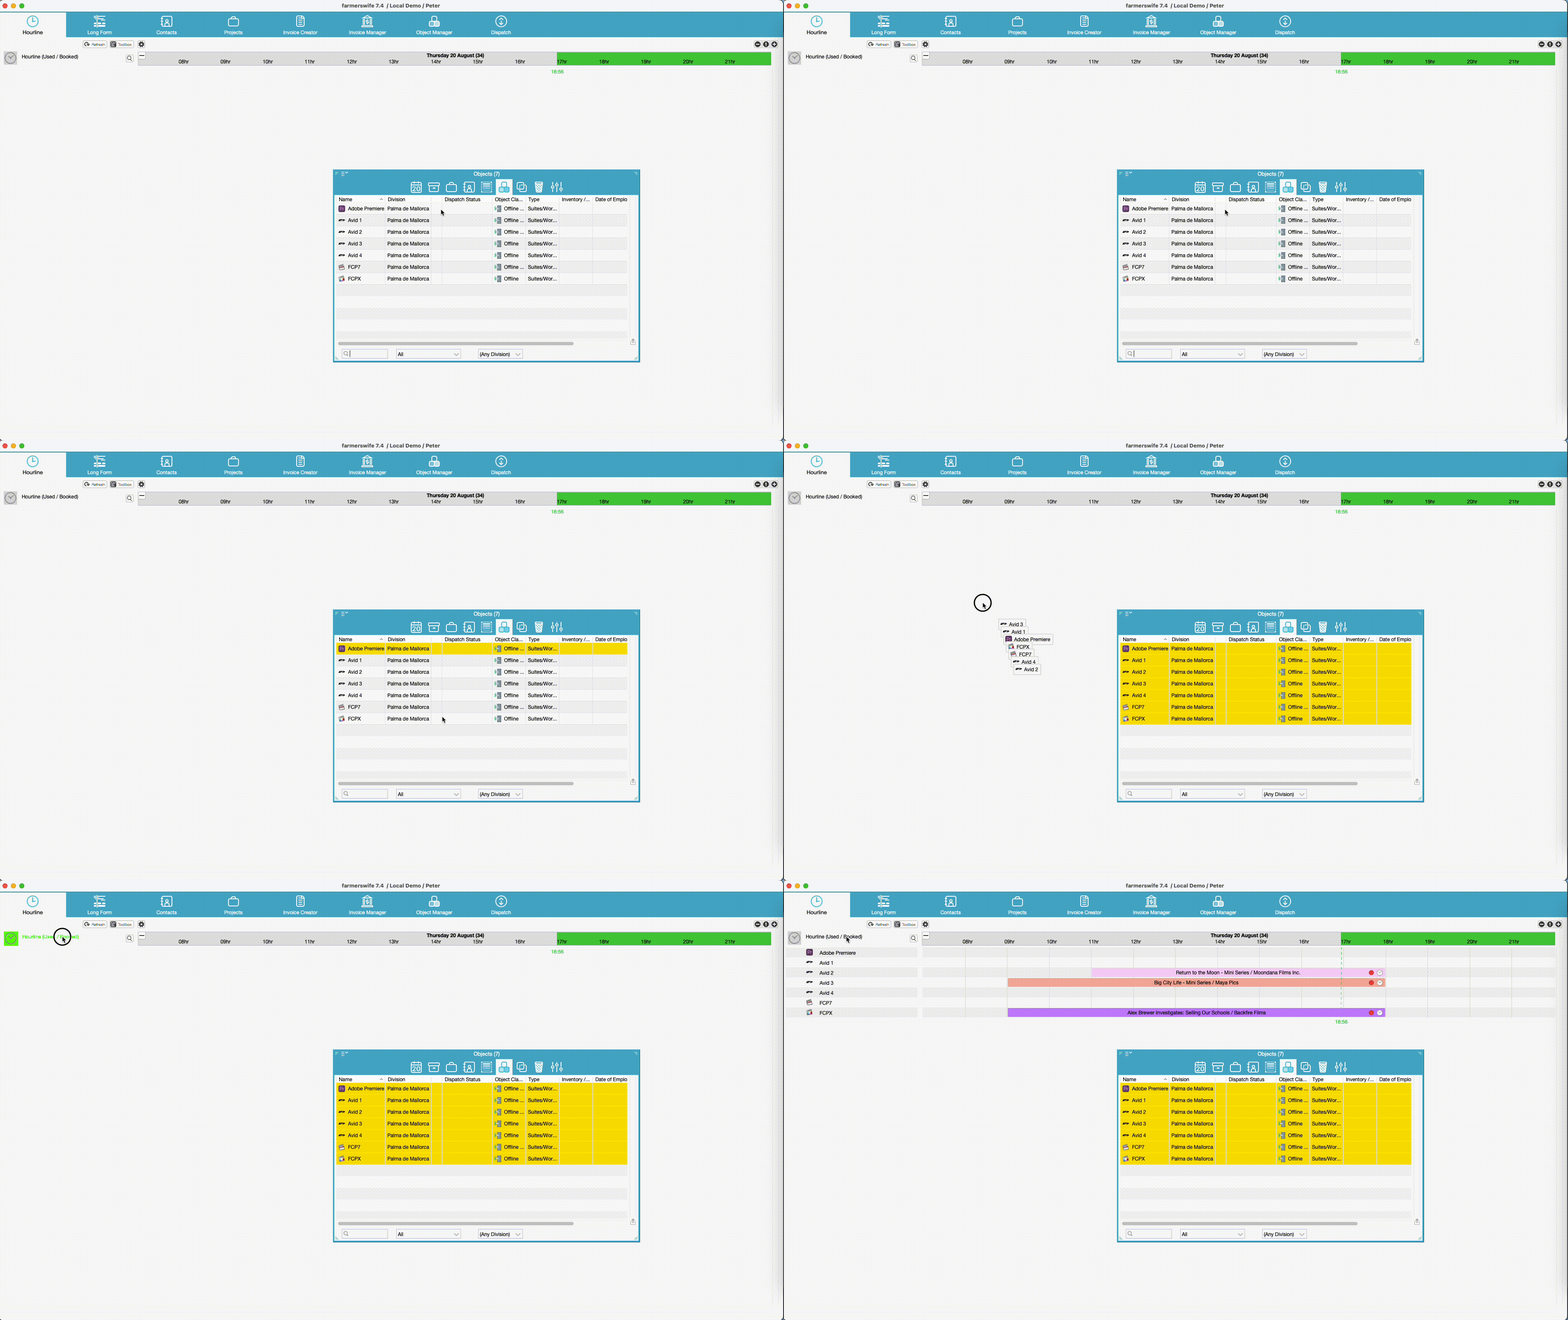
Objects can be added from the Toolbox, from under the Objects tab. Once you have identified the Object(s) you wish to display, click and drag from the Toolbox to the Hourline Clock. The Hourline Clock will turn green and the selected Object(s) will be displayed. This will also replace any Objects that are currently displayed on the Hourline.
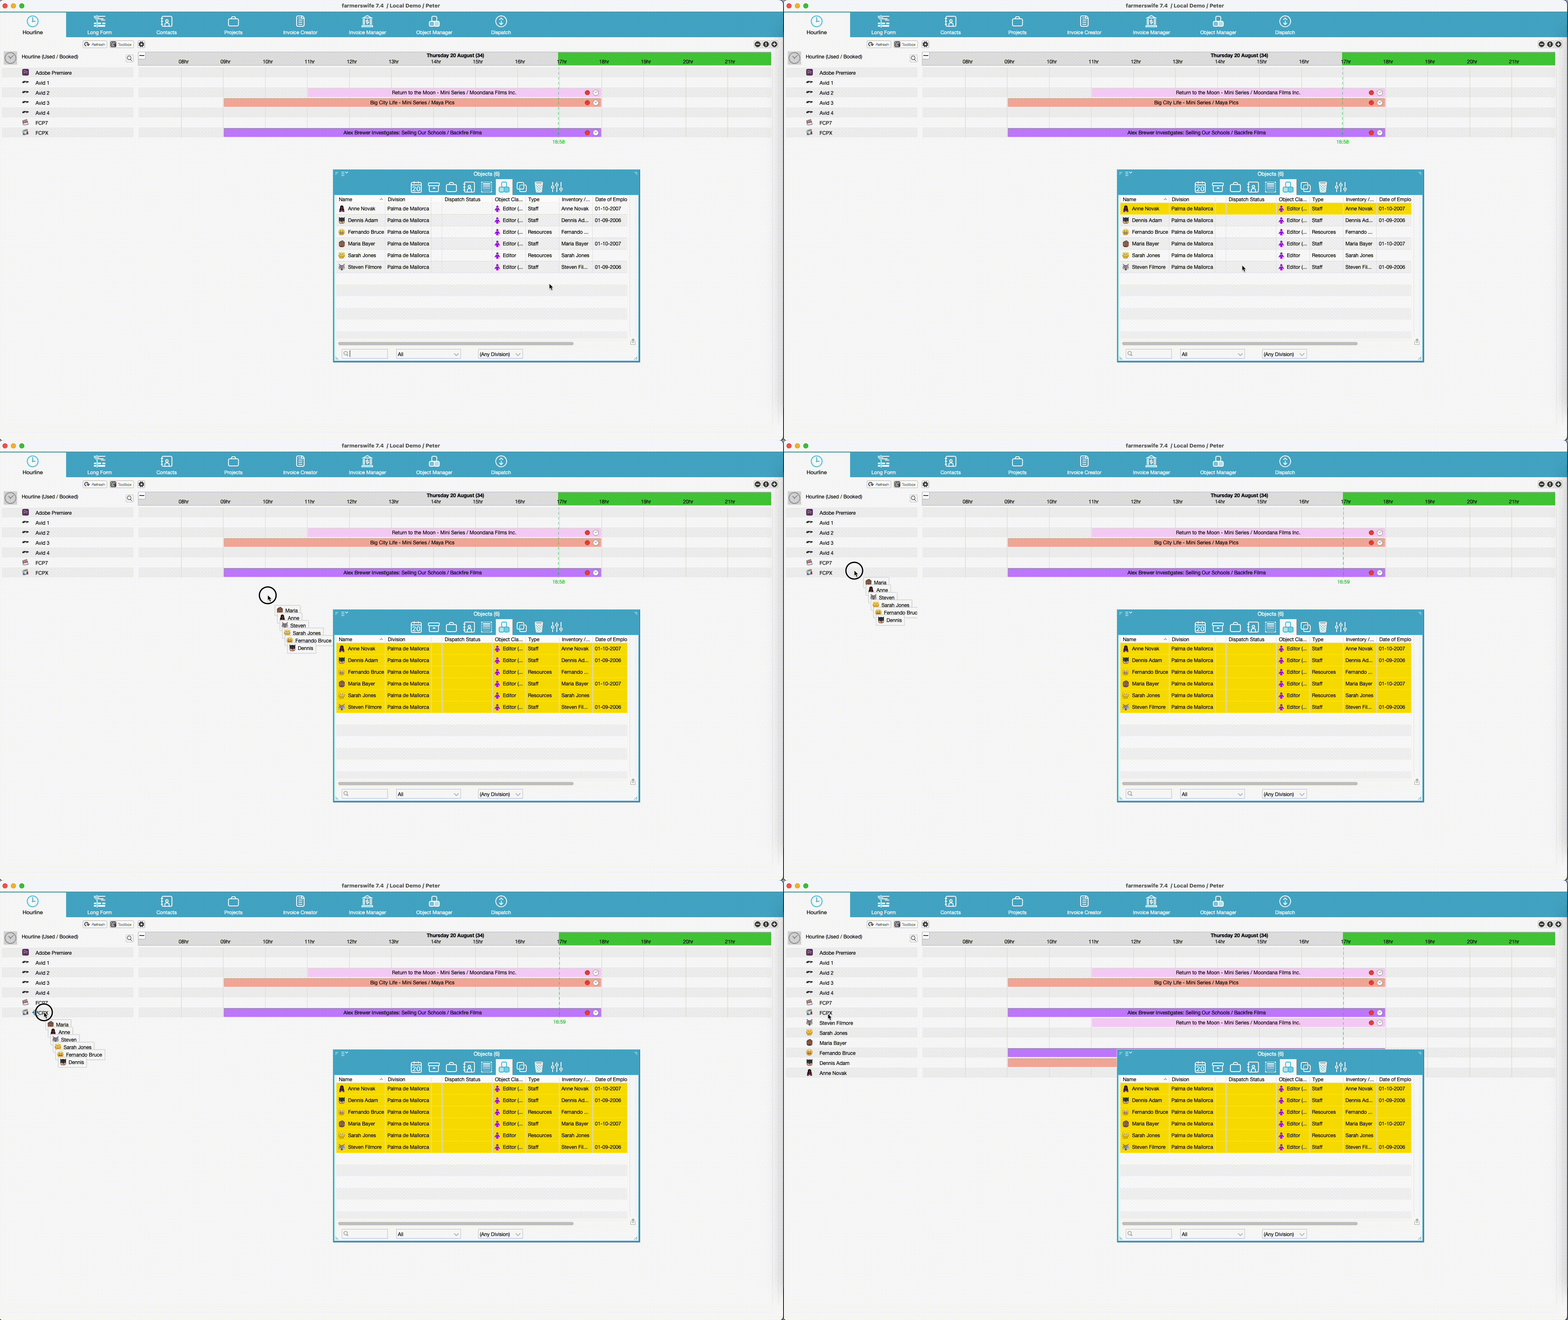
Once the first Objects have been loaded, you can add more from the Toolbox by clicking and dragging a selection over to the names of the displayed objects until you get a blue up/down arrow. Dropping them with arrow up, will place them above the existing Object, down will place below.
Loading Classes Into Your View
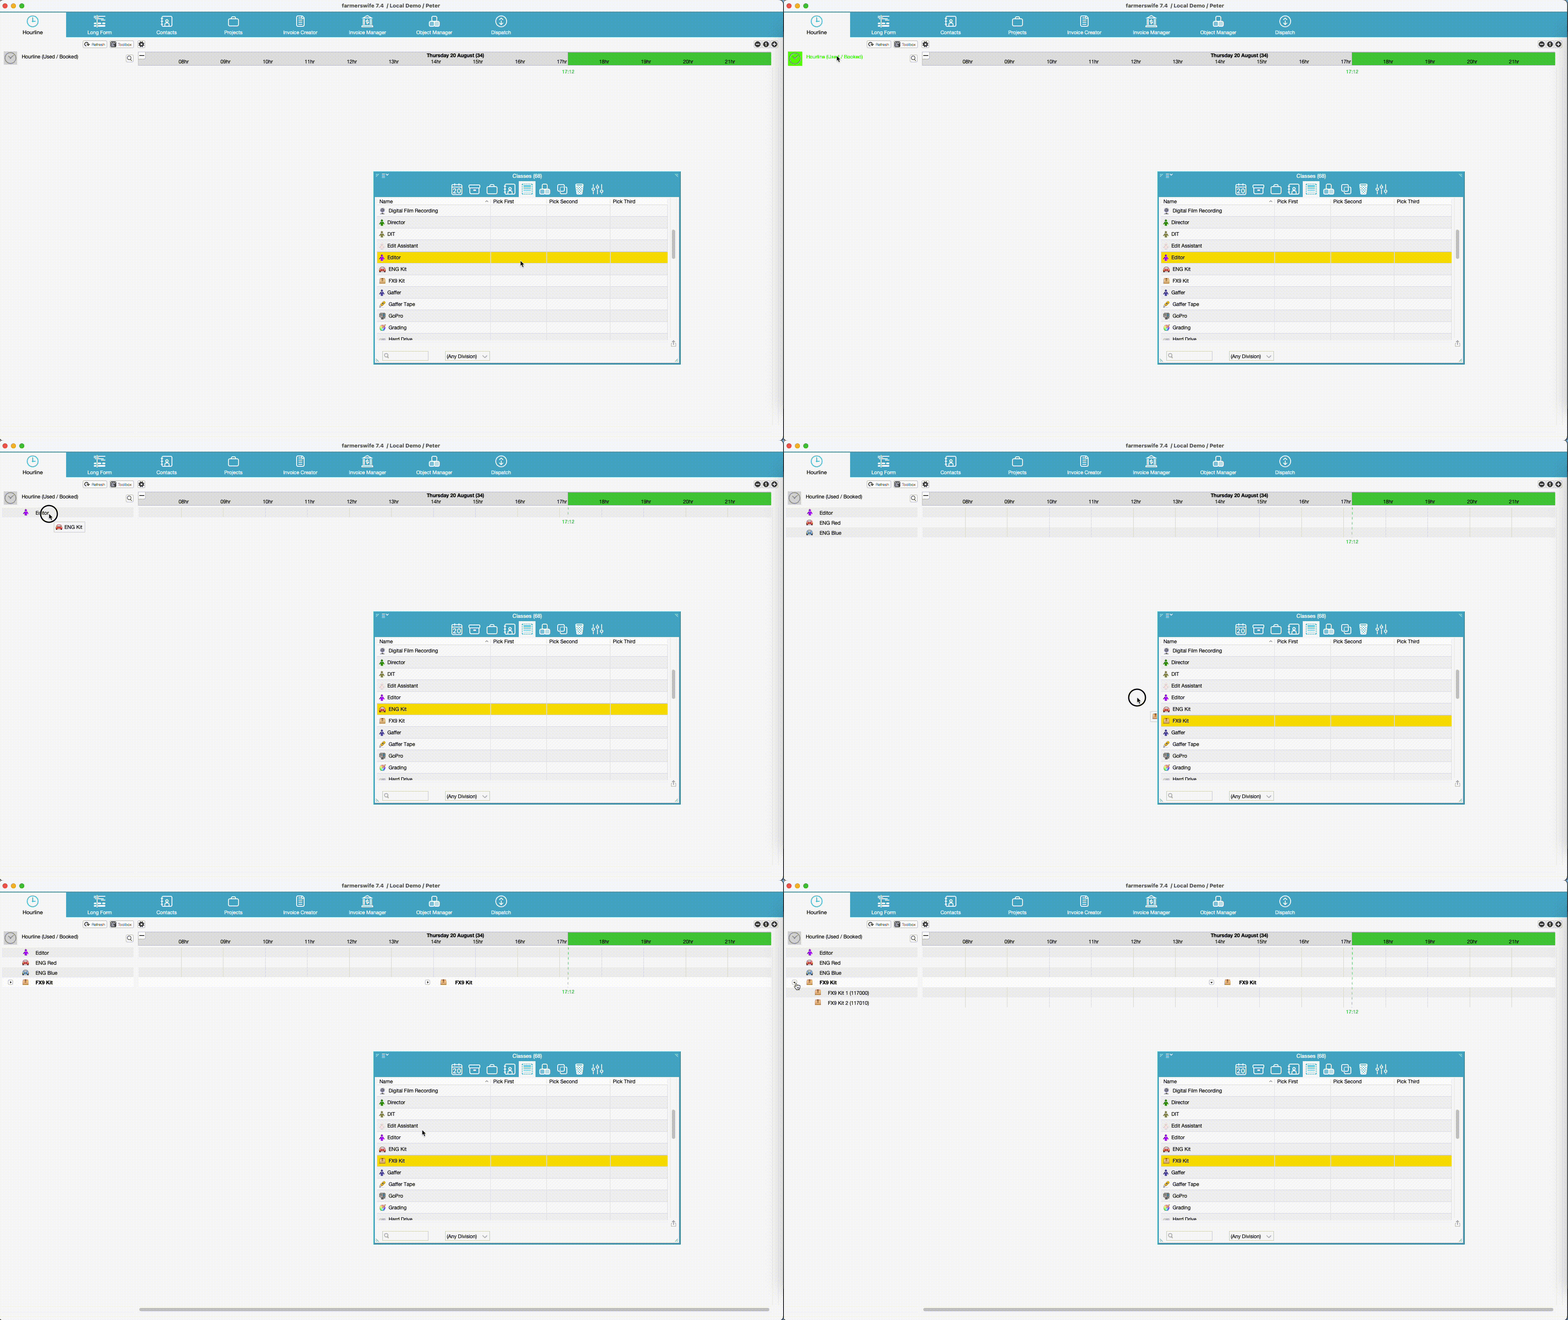
Classes can be added in the same way as Objects, by clicking and dragging from the Object Class tab on the Toolbox. However, when adding a Class you are offered three options, to add:
- Class - This will create a booking line for the Class itself (can be useful for planning).
- Members - This will load the Objects from the selected Object Class into the Hourline View.
- Both - This will add a Grouping containing the Objects from the Object Class (see more about how to use Groupings below).
Using Groupings To Organise Objects
You may wish to organise your Objects into different collapsible groups to better organise them. Groupings can be displayed as open or closed.
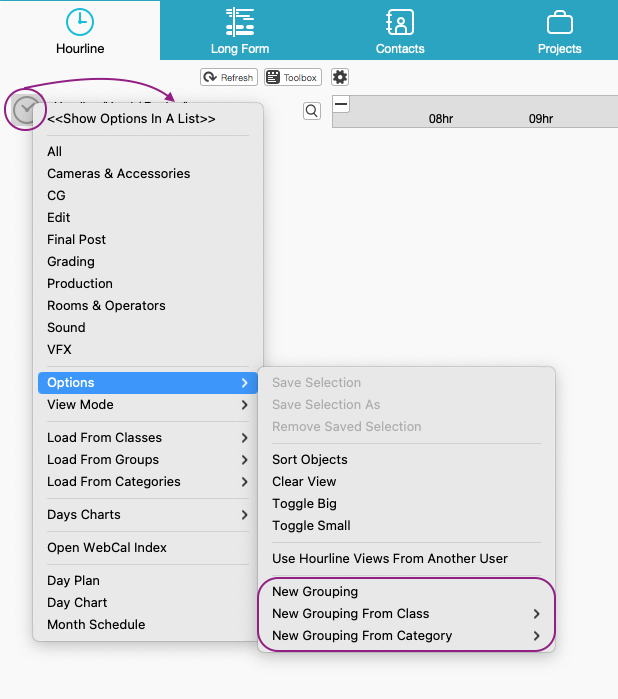
To add Groupings, go to the Hourline Clock menu, and then Options. Here you have three options:
- New Grouping - This allows you to add a Grouping that is manually updated by the user. The name & icon of the Grouping are chosen by a User. Any Objects in this type of Grouping will need to be added, removed and ordered by a User. Objects can be added into the Grouping from the Toolbox, or by clicking and dragging to move any that are already on the View.
- New Grouping From Class - This allows you to add a Grouping based on the Object Class. The Grouping will be named after the Object Class, and the Icon for the Grouping will be the same as the Object Class icon. The Grouping will then add all the active Objects from the Object Class to the Grouping. If an Object is added to or removed from the Object Class in the Object Manager, this will be reflected in the Grouping on the Hourline View. The order of the Objects in the Grouping is always alphabetical, and cannot be altered.
- New Grouping From Category - much like the New Grouping From Class, this Grouping's name will be taken from the Type the Object has been created under in the Object Manager, but the icon can be updated by the User. Objects within this Grouping will be displayed alphabetically, and the order cannot be altered.
Hourline Views can have:
- Multiple Groupings on a single View.
- A combination of the above three types of Groupings.
- Objects in a Grouping, and Objects not in a Grouping.
- The same Object in multiple Groupings.
When saving a View, any Grouping or Category that is open at the point of saving, will be saved this way to the View. Similarly, any Grouping or Category that is closed at the point of saving, will be saved this way to the View. You can have a combination of open and closed Groupings on a single View.
Ordering Groupings
To re-order any displayed Groupings, click the icon for the Grouping, and you can choose to: Move Up, or Move Down. This will move the Grouping by one Grouping or Object line at a time. Unfortunately you cannot click and drag a Grouping up/down to re-order.
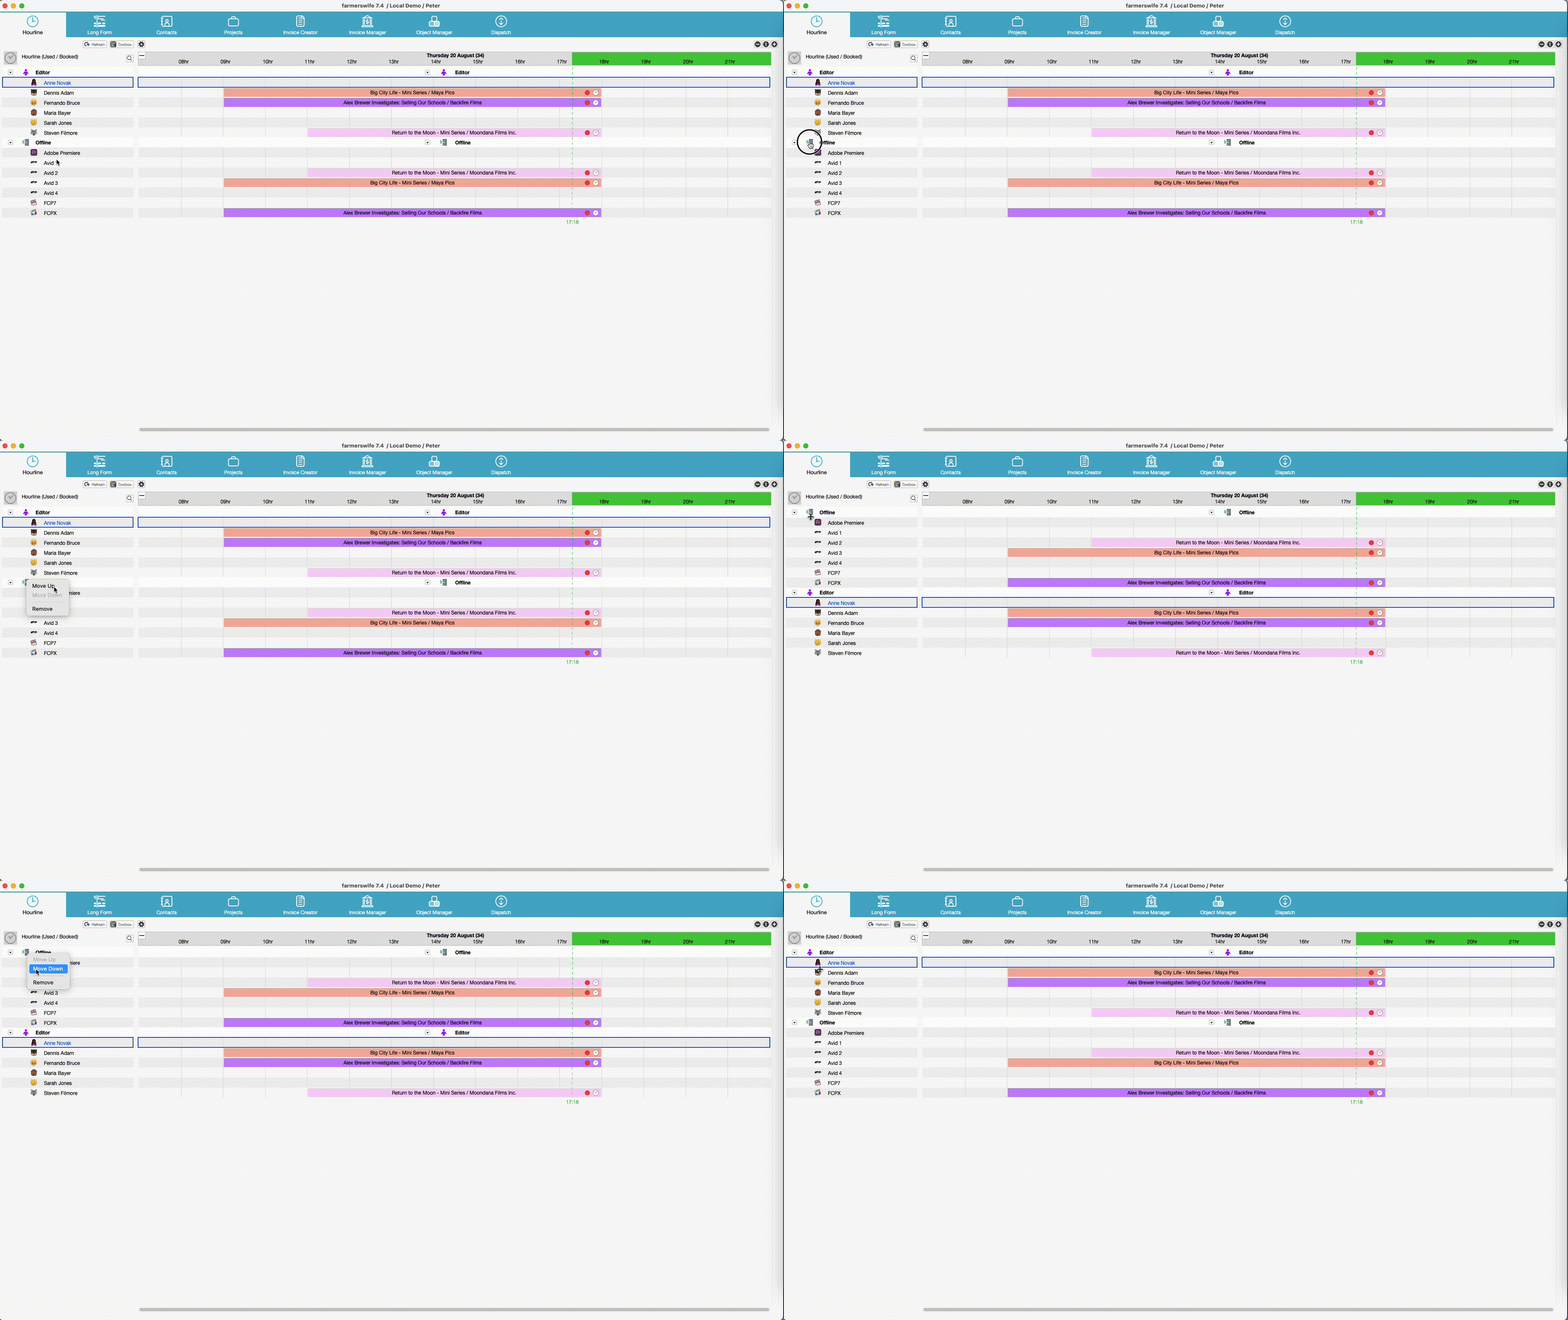
You can also sort all Objects and Groupings alphabetically in your View by clicking the Hourline Clock menu, and then Options > Sort Objects.
Removing Objects From Your View
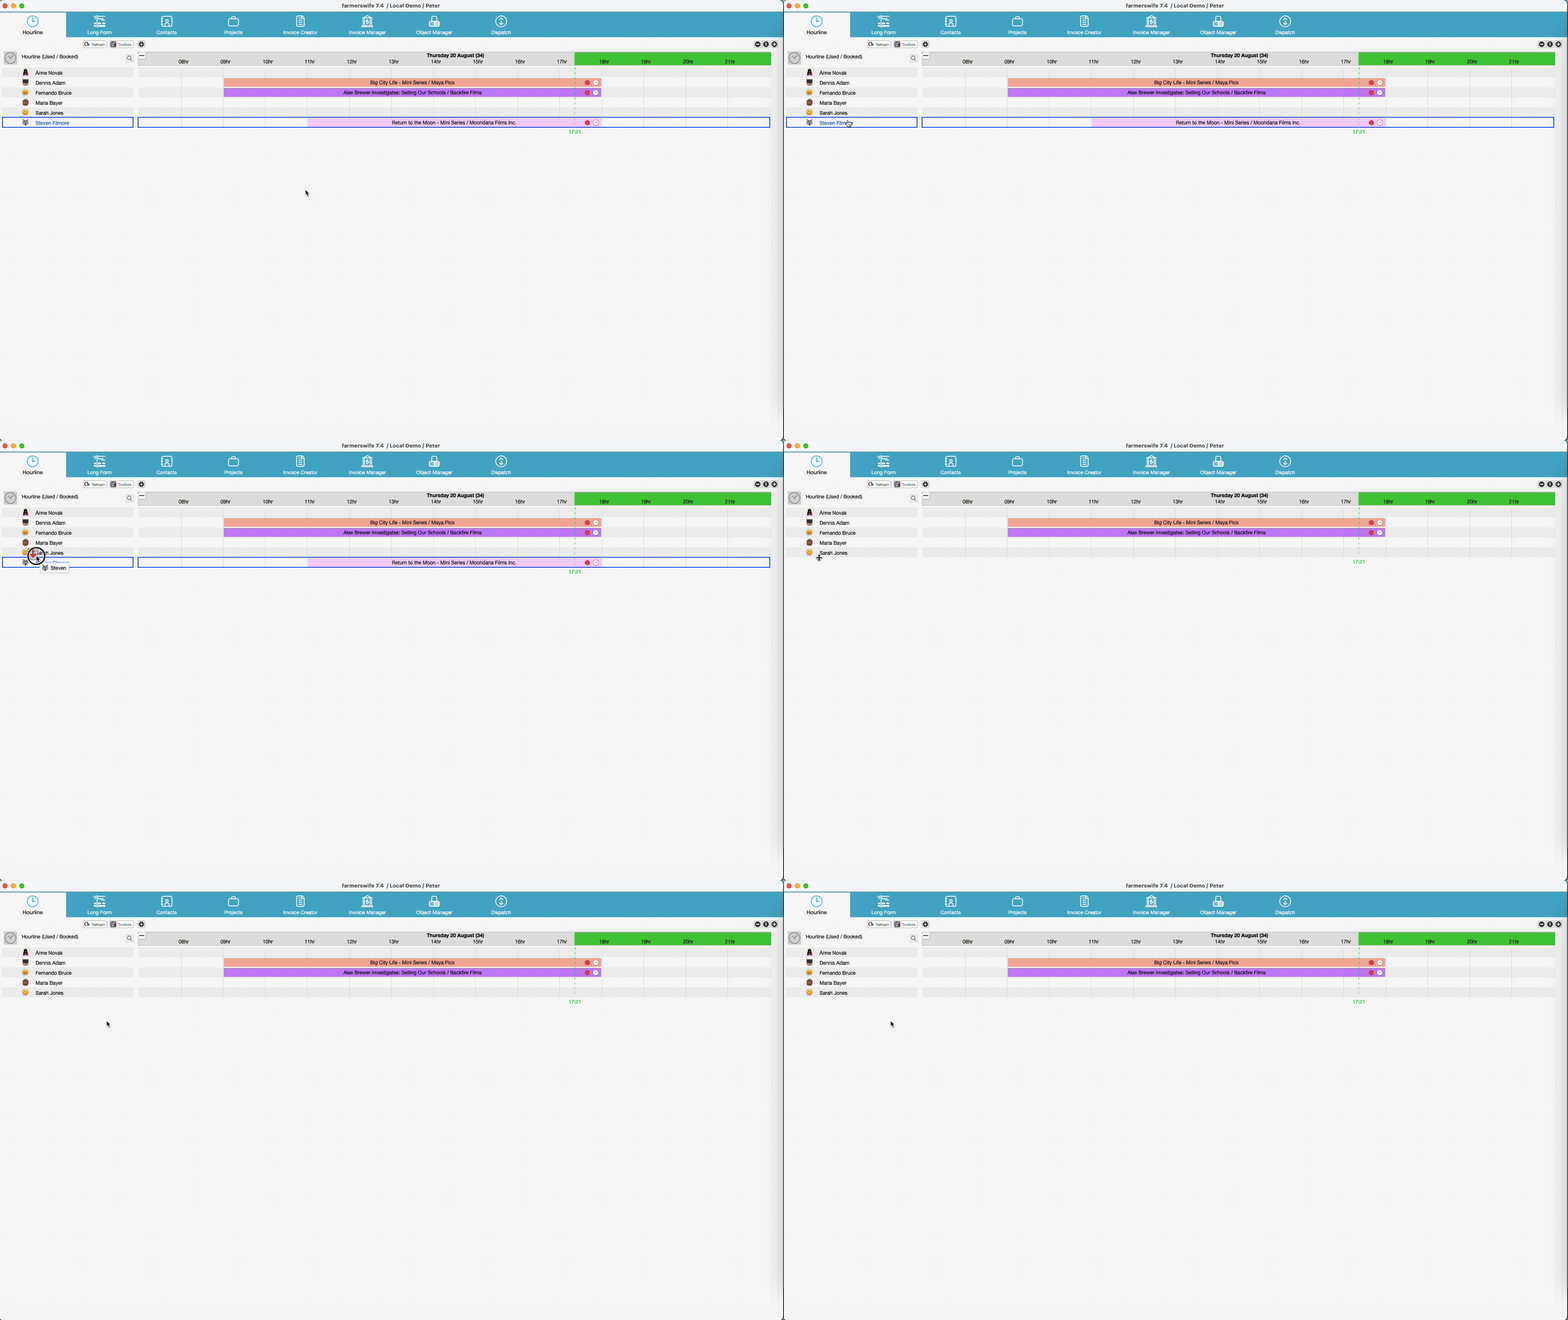
To remove an Object from your view, click and drag it by the text, and drop in the trash can that will appear.
Toggle Size Of Objects & Groupings
The line height of an Object or Grouping in your view can be updated by clicking and dragging the separator line between them.
If you wish to Toggle the height for all Objects & Groupings in your view, click the Hourline Clock menu, go to Options, and then:
- Toggle Big - This will increase the height of all Objects & Groupings based on your Toolbox Hourline settings.
- Toggle Small - This will decrease the height of all Objects & Groupings based on your Toolbox Hourline settings.
Please Note: to change the set height of your Toggle Big / Toggle Small, please refer to our article on Toolbox Hourline Settings.
Saving, Updating or Removing A View
Saving A View
Once you have added all your desired Objects, Resources, Classes, Categories or Groupings to your View, you need to save it so that it can be recalled from the Hourline Clock menu at a later date.
If you cannot save or share a View, please check with an admin user to ensure you have the correct User Permissions.
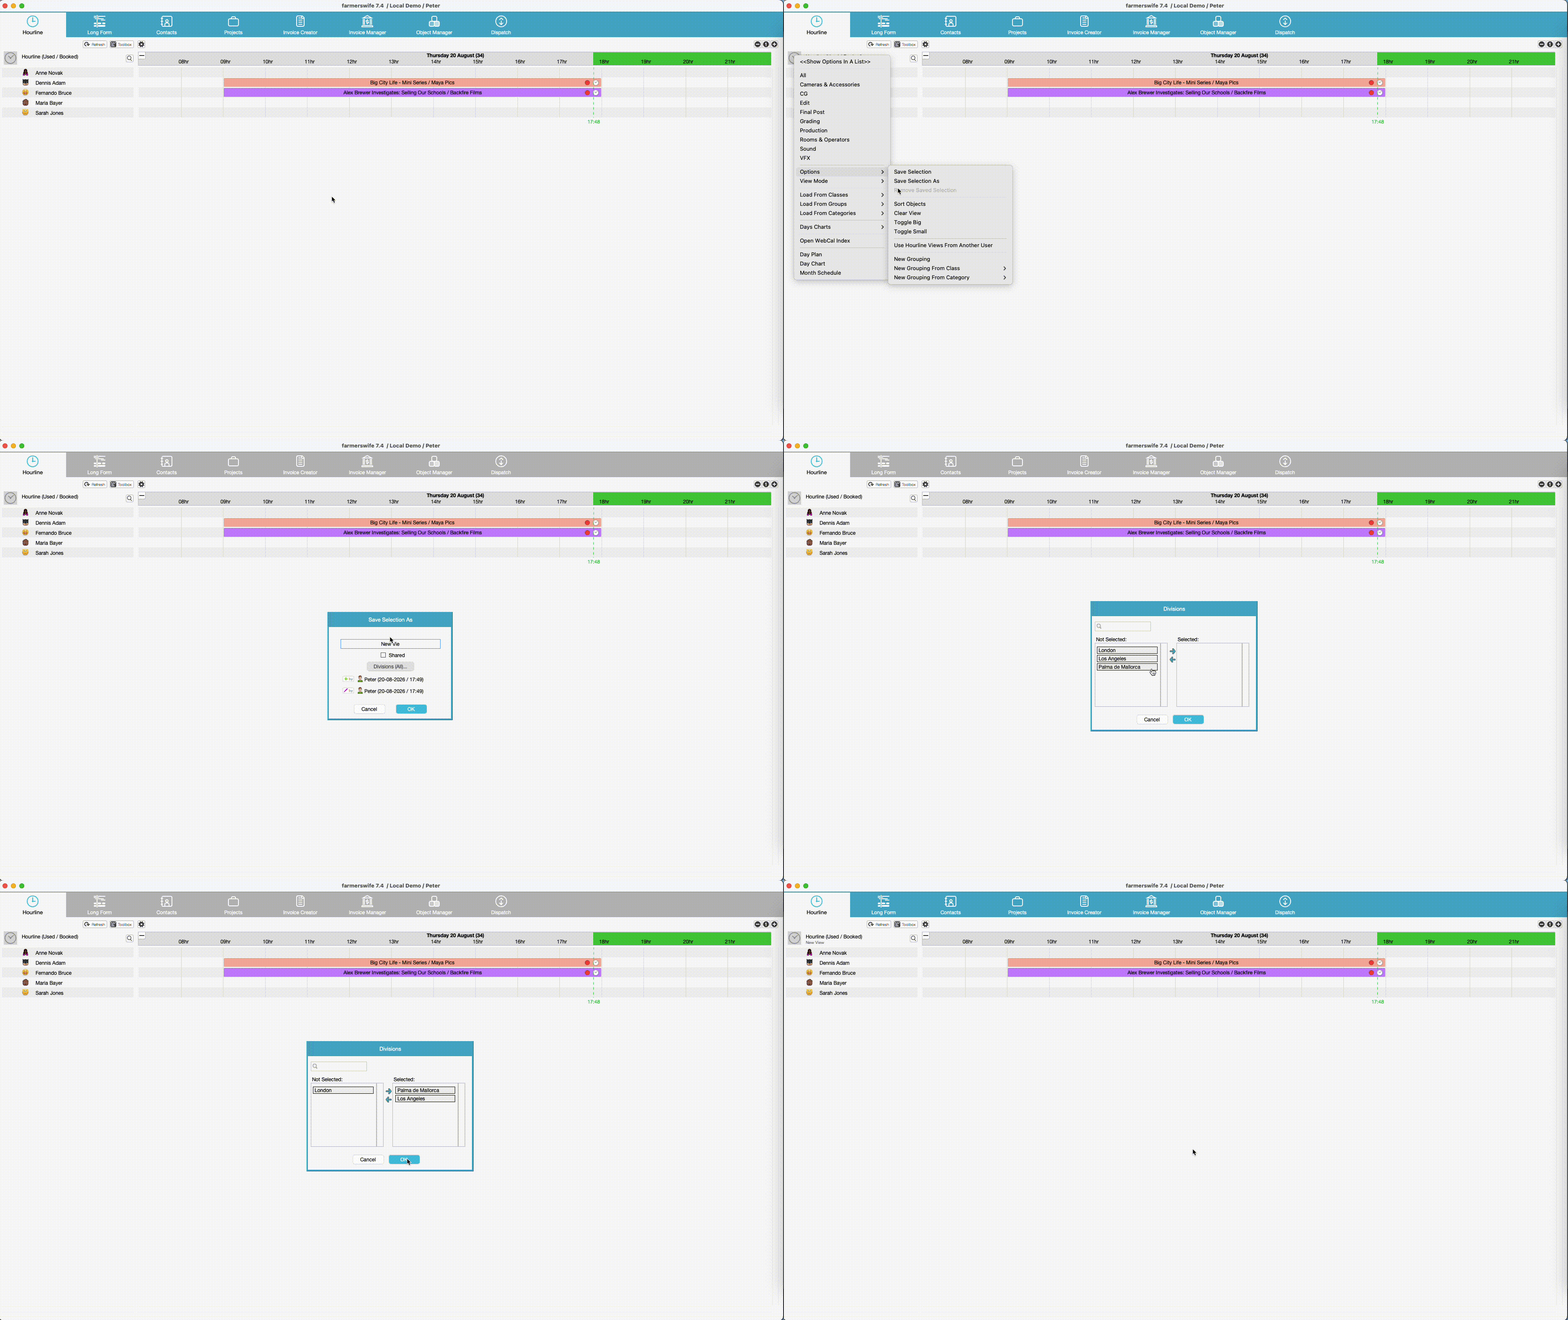
To save the View, click the Hourline Clock menu, and again go to Options. From here you have a couple of choices:
- Save Selection - This will prompt you to name your View. If you are updating an existing view, the name will be pre-filled with the name of the view you are updating, and on saving, the existing view will be overwritten.
- Save Selection As - This will prompt you to save the View as entirely new View. If you are updating a View but don't want to overwrite the existing, choose this option. If you wish to duplicate an existing view, you should choose this option and use a new name.
Sharing a View With Other Users
When saving and naming a View, a checkbox under the name field will show, asking if you wish to make this a Shared View. If you check the checkbox to make your View Shared, any User that is able to see Hourline Views will be able to see your View. If you want this to remain a Personal View, leave the checkbox unchecked when saving.
Sharing A View With Users In Selected Divisions
If you have the Divisions Module, and you share a View, you have the option to choose the Divisions that the View is shared with. After checking the Shared checkbox, the Divisions button will appear. Here, select the required Divisions. Only users in the selected Divisions will see the View in their Hourline Clock menu. The default selection is set to "Divisions (All)".
Points to note when sharing views across Divisions:
- The View's owner always sees their own View, even if their Division is not in the list.
- Users with no Division assigned only see Shared Views that are not restricted (Divisions = All).
- The Division picker only lists active Divisions. If a Division is deactivated after being saved on a View, re-save the View to refresh the list.
- The Division restriction controls who can see the View definition. It does not change which Bookings, Personnel Events or Schedules are displayed inside the View.
- Editing the Division restriction is available in the fw Desktop Client only. The fw Web Client and fw iOS app honour the restriction when reading.
- When upgrading through v7.4, all existing Shared Views are preserved as Divisions (All).
- The Save As action always starts the new copy with no Division restriction, re-pick the Divisions if needed.
Updating An Existing View
To update a View, first select the View from the Hourline Clock menu.
Any View that has been saved can be updated with by adding new Objects; removing Objects; expanding or collapsing existing Groupings; or changing the order or Objects & Groupings in the View.
You can also update the name and icon of a New Grouping, or the icon of a Grouping From Category, by clicking the existing icon of the Grouping and clicking Edit. A prompt will appear allowing you to update them.
Once all changes have been made, go to the Hourline Clock Menu and then Options. As per the above, choose Save Selection ([name of view]) to update and overwrite the existing View; and choose Save Selection As to create a new View based on the existing View.
Removing An Existing View
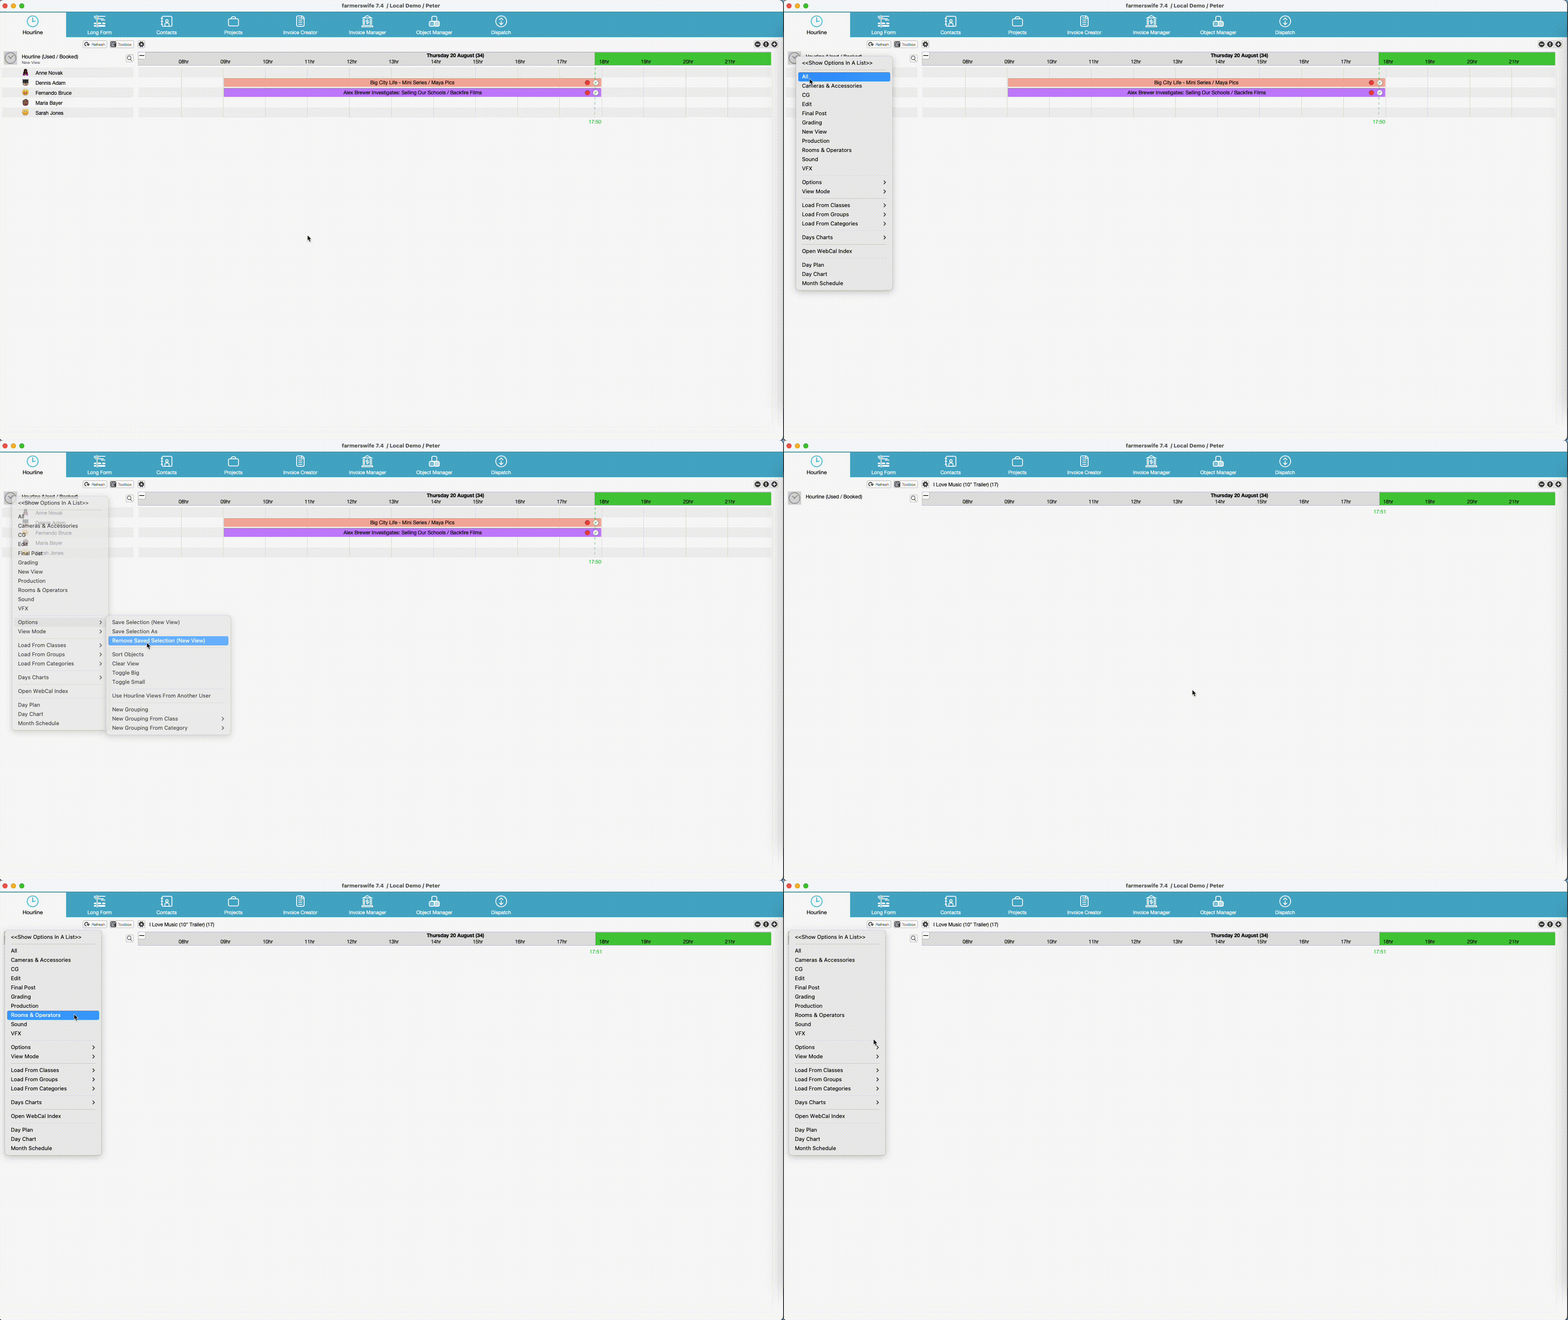
To remove a View, you must first select it from the Hourline Clock menu. Once selected, go to the Hourline Clock menu, and navigate to Options. Here select: Remove Saved Selection ([name of view]). This will then prompt you to confirm removal. Once confirmed, the View will no longer be available from the Hourline Clock menu.
Using A View From Another User
There is the ability for a User to use another User's Views. To do this, go to the Hourline Clock menu, then Options and select Use Hourline Views From Another User. This will prompt you to choose a User to use the Views from. Once selected, the Views that you have access to on the Hourline Clock menu will follow those of the selected User.
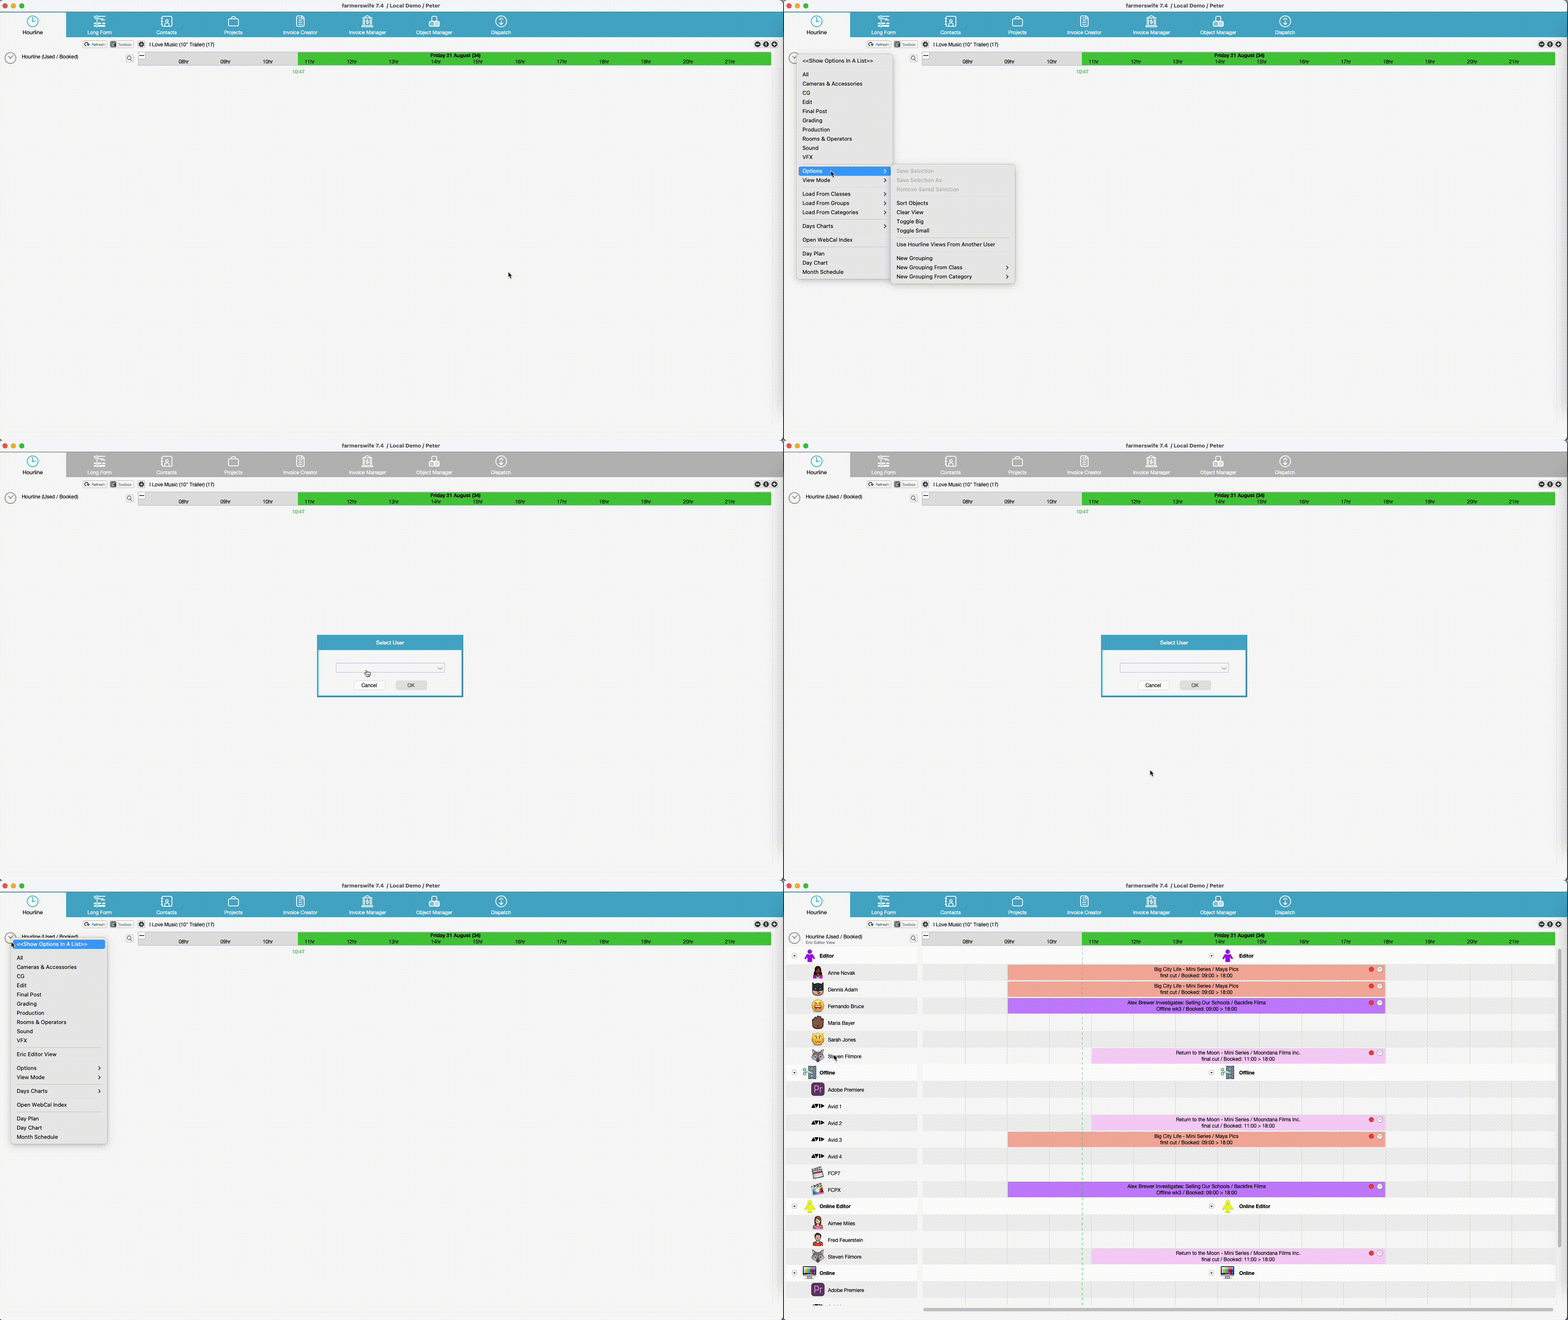
If you wish to revert to your own View selection, go back to the Hourline Clock menu, then Options, and select Stop Using Views From Another User. The Views you have access to on the Hourline Clock menu will have reverted to your own.
For more info on this, please see our separate article: Using a Display List From Another User.
Hourline View Mode
The bookings in your Hourline can be displayed in three ways:
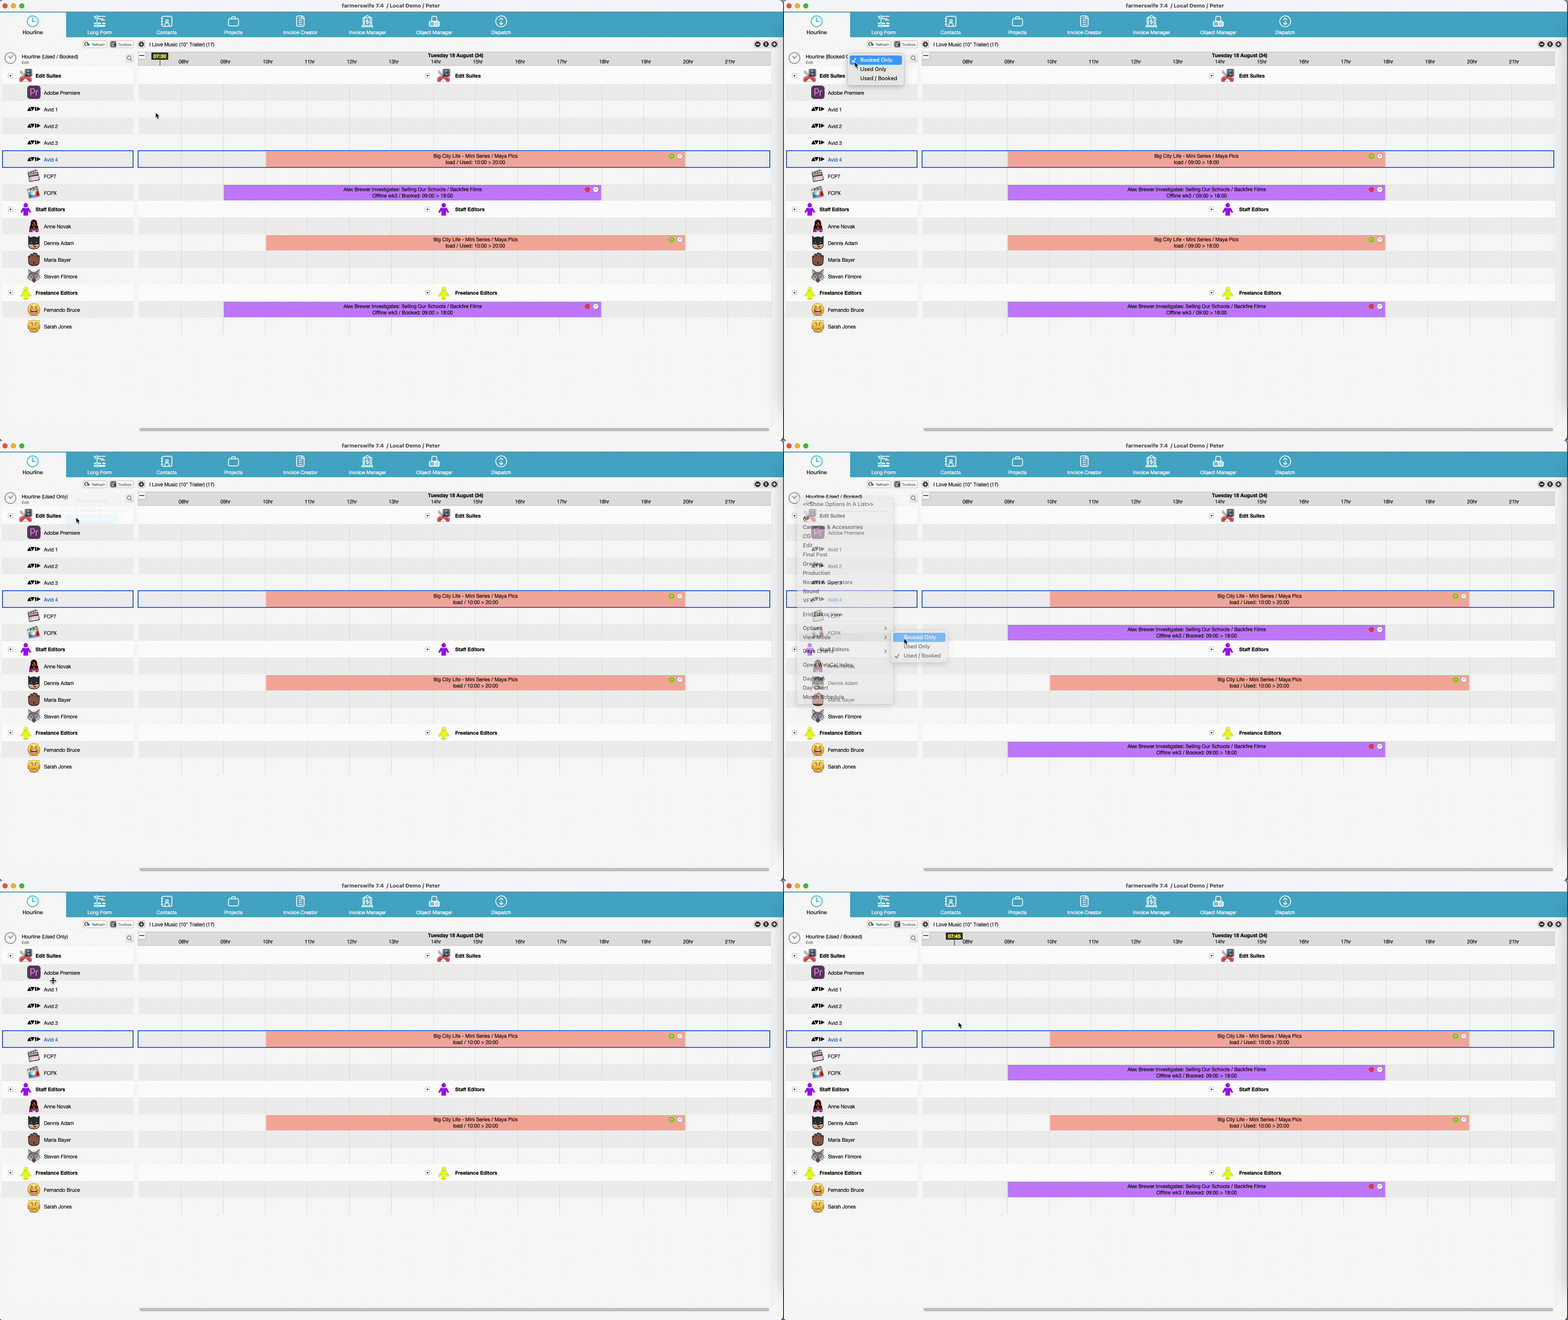
- Booked Only - This displays all bookings as they were originally booked on the timeline.
- Used Only - This will only display a booking if it has been Timereported. The duration of the booking on the timeline will then reflect the reported duration, which may be different from the booked duration.
- Used/Booked - This will display the Booked time, until the booking has been Timereported. Once Timereported, the booking on the timeline will reflect the reported duration, which may be different from the booked duration.
You can alter the View Mode by either:
- clicking to the right of the Hourline header where one of the above options will be showing, and selecting the option to switch to.
- going to the Hourline Clock menu, selecting View Mode, and then choosing one of the above options.
Other Options to Choose On The Hourline Clock Menu
Load From...
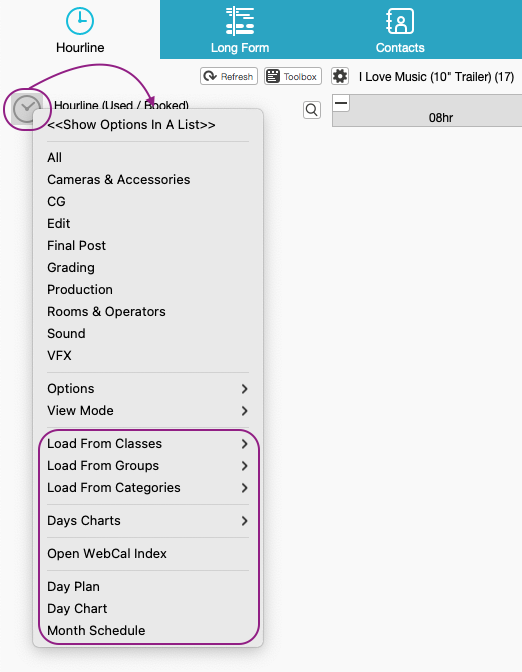
This will load the Objects relating to the selected option, in to your View on the Hourline. You can choose from:
- Load From Classes - Allows you to load all Objects/Users/Resources from an Object Class.
- Load From Groups - Allows you to load all Objects/Users/Resources from a Group that's been set in the Object Manager.
- Load From Categories - Allows you to load all Objects related to each Type in the Object Manager, for example all Users or all Resources.
Days Charts
This allows you to export Hourline information to a CSV. Please see our Days Charts article for more.
Open WebCal Index
This allows you to open a web page with all WebCal calendar subscriptions open to your User. Please see our WebCal article for more.
Day Plan
This allows you to export a report showing the schedule for all of the Objects in View on the Hourline, for the first day displayed on the Hourline. Please see our Day Plan article for more.
Day Chart
This allows you to export a report showing the hourly breakdown of bookings across the Objects in view on the Hourline. Please see our Day Chart article for more.
Month Schedule
This allows you to export a report showing the Monthly Schedule for the Objects in view on the Hourline. Please see our Month Schedule Reports article for more.
User Permissions
For sharing Views on the Hourline, you need to have certain User Permissions.
The main permissions to adjust are:
- Can Create/Modify/Delete All Shared Hourline Views - This is disabled by default.
- Can Create/Modify/Delete Their Own Shared Hourline Views - This is enabled by default.
Different combinations of these new Permission settings:
- If both permissions are disabled, the User will only be able to create Personal Hourline Views.
- If only Can Create/Modify/Delete Their Own Shared Hourline Views is enabled, the User will only be able to create/modify/delete their own Shared Hourline Views.
- If the permission Can Create/Modify/Delete All Shared Hourline Views is enabled, the User will be able to create/modify/delete ALL Shared Hourline Views.
- When sharing a View with Users from selected Divisions, Users outside the selected Divisions will not see the View in their list, regardless of the permission settings above. The View's owner is always exempt from this restriction.
Was this article helpful?
That’s Great!
Thank you for your feedback
Sorry! We couldn't be helpful
Thank you for your feedback
Feedback sent
We appreciate your effort and will try to fix the article