The Contacts tab on the top Module Bar is known as the Advanced Contact Search. The Advanced Contact Search (ACS) provides users with advanced filter and search capabilities, along with the options to export contacts to both PDF & CSV.
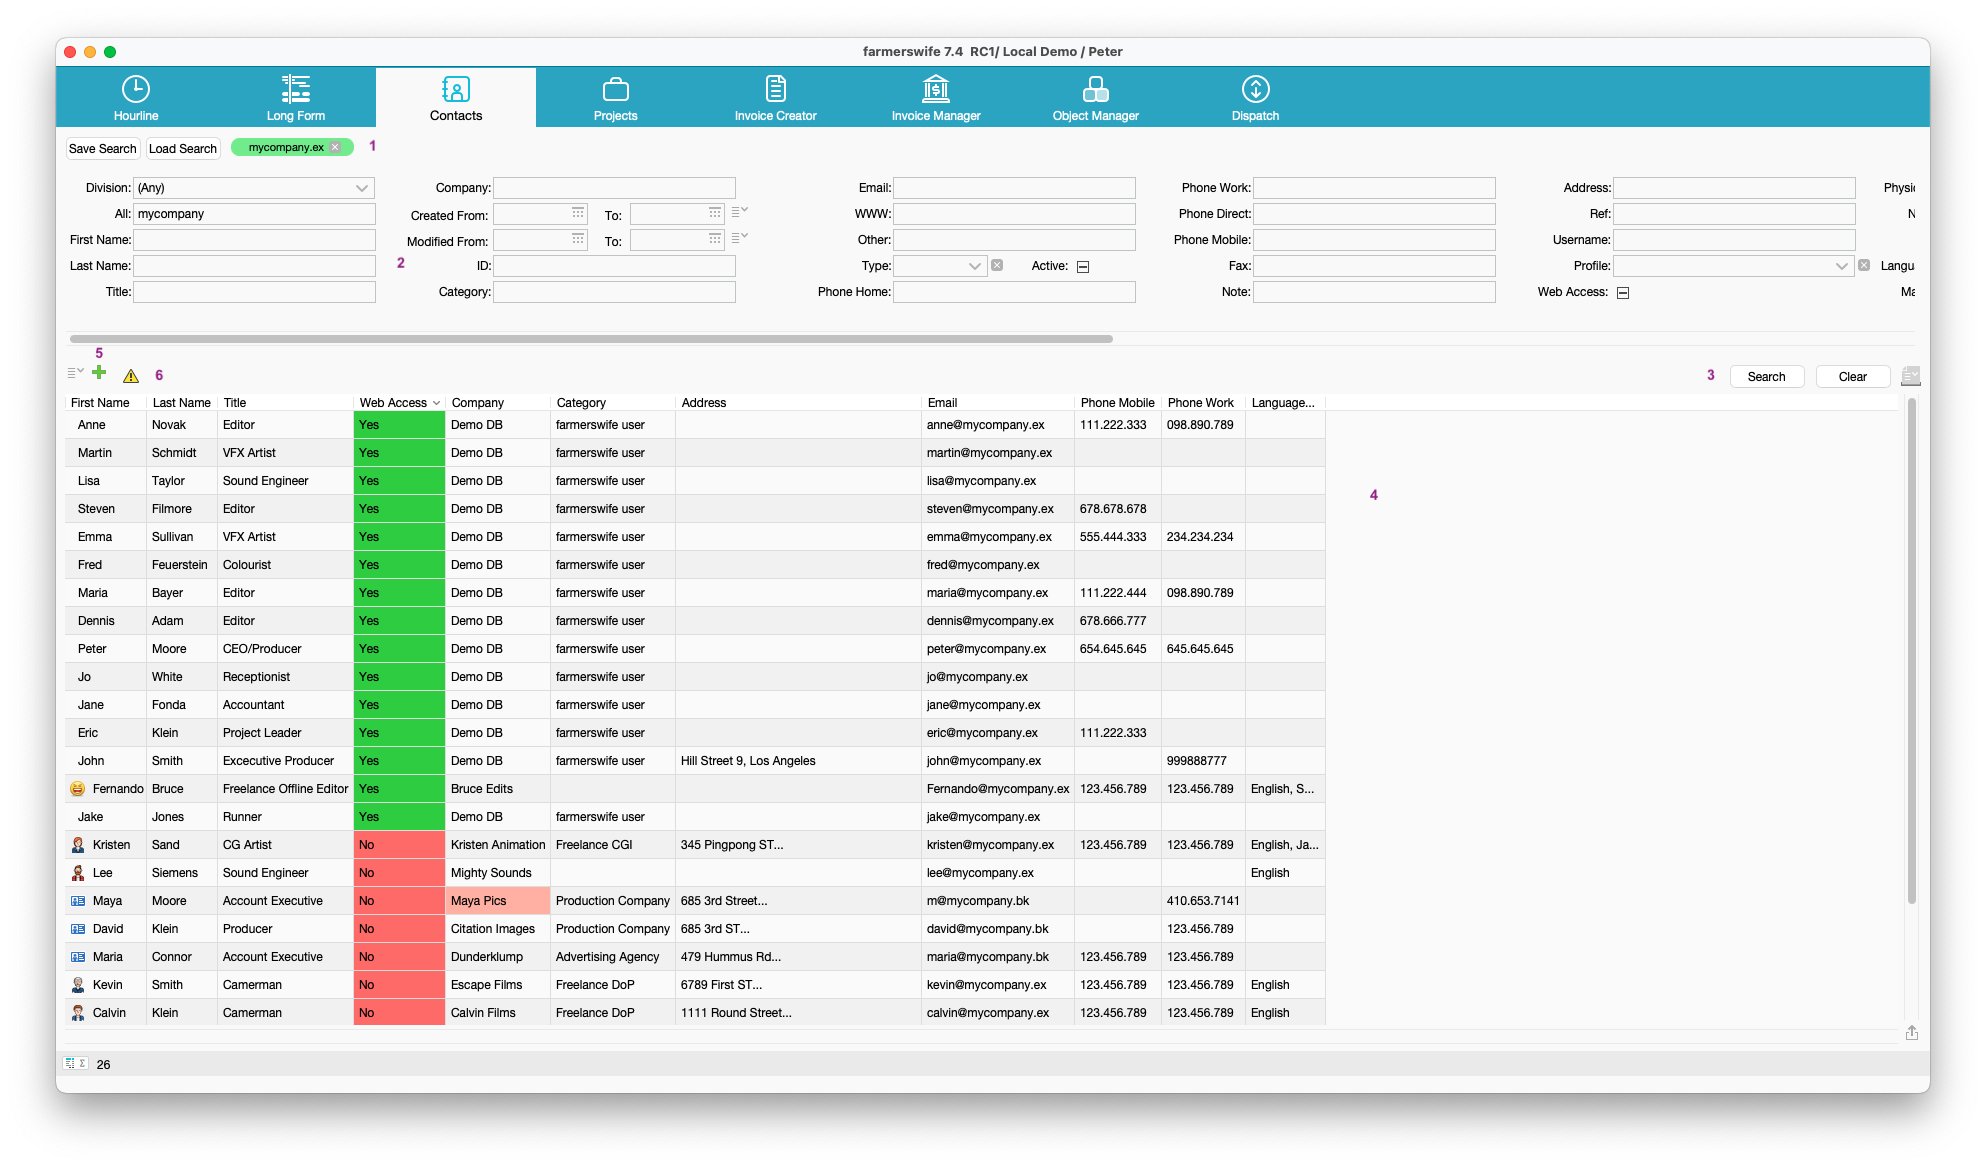
1. Saving & Loading Searches
Since 7.4, you can save a Search configuration.
- Save Search - Once you have set filters for a search, click the Save Search button to save and name (via pop up) the search you have made.
- Load Search - Once you have search queries saved, click the Load Search button to return to a saved search (via pop up).
- Search Name - when using a saved search, the name of that search will be displayed to the right of the Load Search button. Clicking the x on the right of the search name will clear the saved search filters.
2. Search Filters
Across the top of the ACS are all of the search filters you can use for your contacts. This will consist of standard farmerswife Contact fields, and any Contact Custom fields that have been added at server level. You can also use Object Custom Field templates on your contacts, for further filters.
3. Search & Clear
These two buttons on the right under the filters, are used to Search with the input filters, or to Clear any input filters ready for the next search.
4. Results Pane
This section will show any results, determined by entered filters.
5. Add New Contact
Adding a new contact can be done in three ways within the ACS:
- using the green + icon to open a new contact pane where you can enter the details for a new contact.
- using the menu icon, and then selecting "New Contact" on the menu. Again a new contact pane opens.
- Selecting an exiting contact, right clicking and selecting either "New Contact" or "New Contact From: xx".
6. Maximum Hits When Searching
If you can see a yellow Caution icon above the Results Pane, then this will mean your search is limited to a certain number of results. Clicking the yellow Caution icon will clear this limitation temporarily.
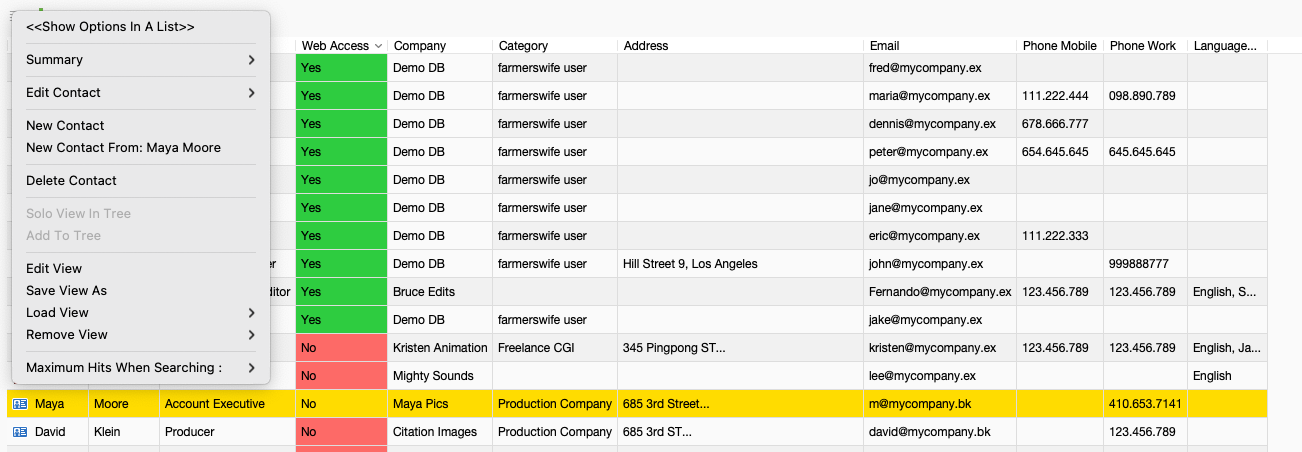
Menu
Within the menu you have:
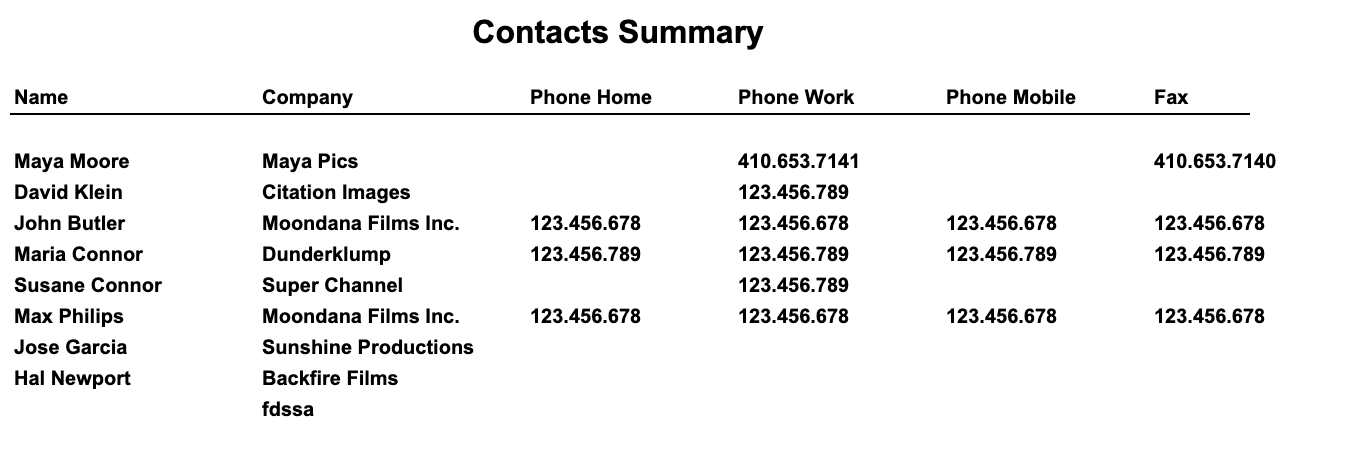
- Summary - Default Contact Summary will create an HTML report of the displayed contacts
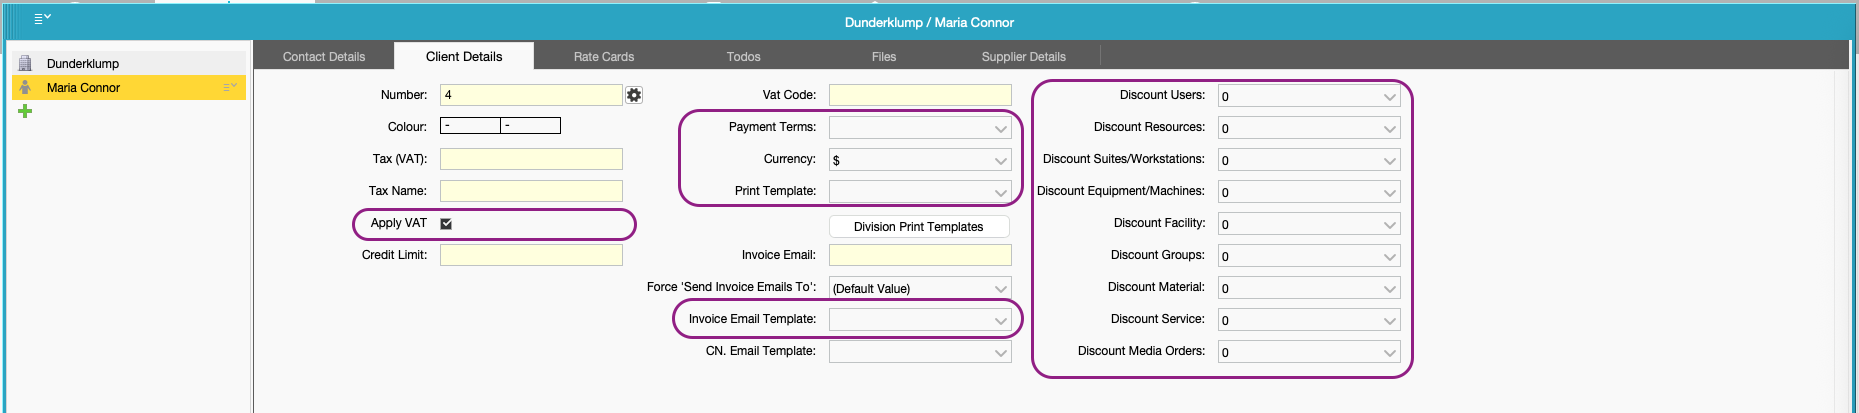
- Edit Contacts - Since 7.3, selecting one or more contacts will allow you to Bulk Edit their fields and custom fields collectively, providing all selected contacts are editable. When Bulk Editing, the first selected contact's information will be used as the default data to edit. Fields that can be Bulk Edited are:
- Custom Fields
- Active Yes/No (via pop up)
- Apply Tax
- Currency
- Discount
- Division (via pop up)
- Invoice Email Template
- Payment Terms
- Print Template
- New Contact - Opens new contact window.
- New Contact From - Will only appear when a contact is selected, and allows you to create a new contact by copying an existing contact's data to edit for a new contact.
- Delete Contact(s) - Since 7.2, will allow you to remove one or more contact after selecting them.
- Solo View In Tree - Only available when selecting Resources, will allow you to view the selected Resources in the Timeline.
- Add To Tree - Only available when selecting Resources, will allow you to add the selected Resources to the Timeline.
- Edit View - Allows you to configure which columns are used when displaying search results in the Results Pane. Elements listed on the right (Show) will be seen. Their order can be modified by clicking and dragging up and down. Any elements on the left (Hide) will not be seen.
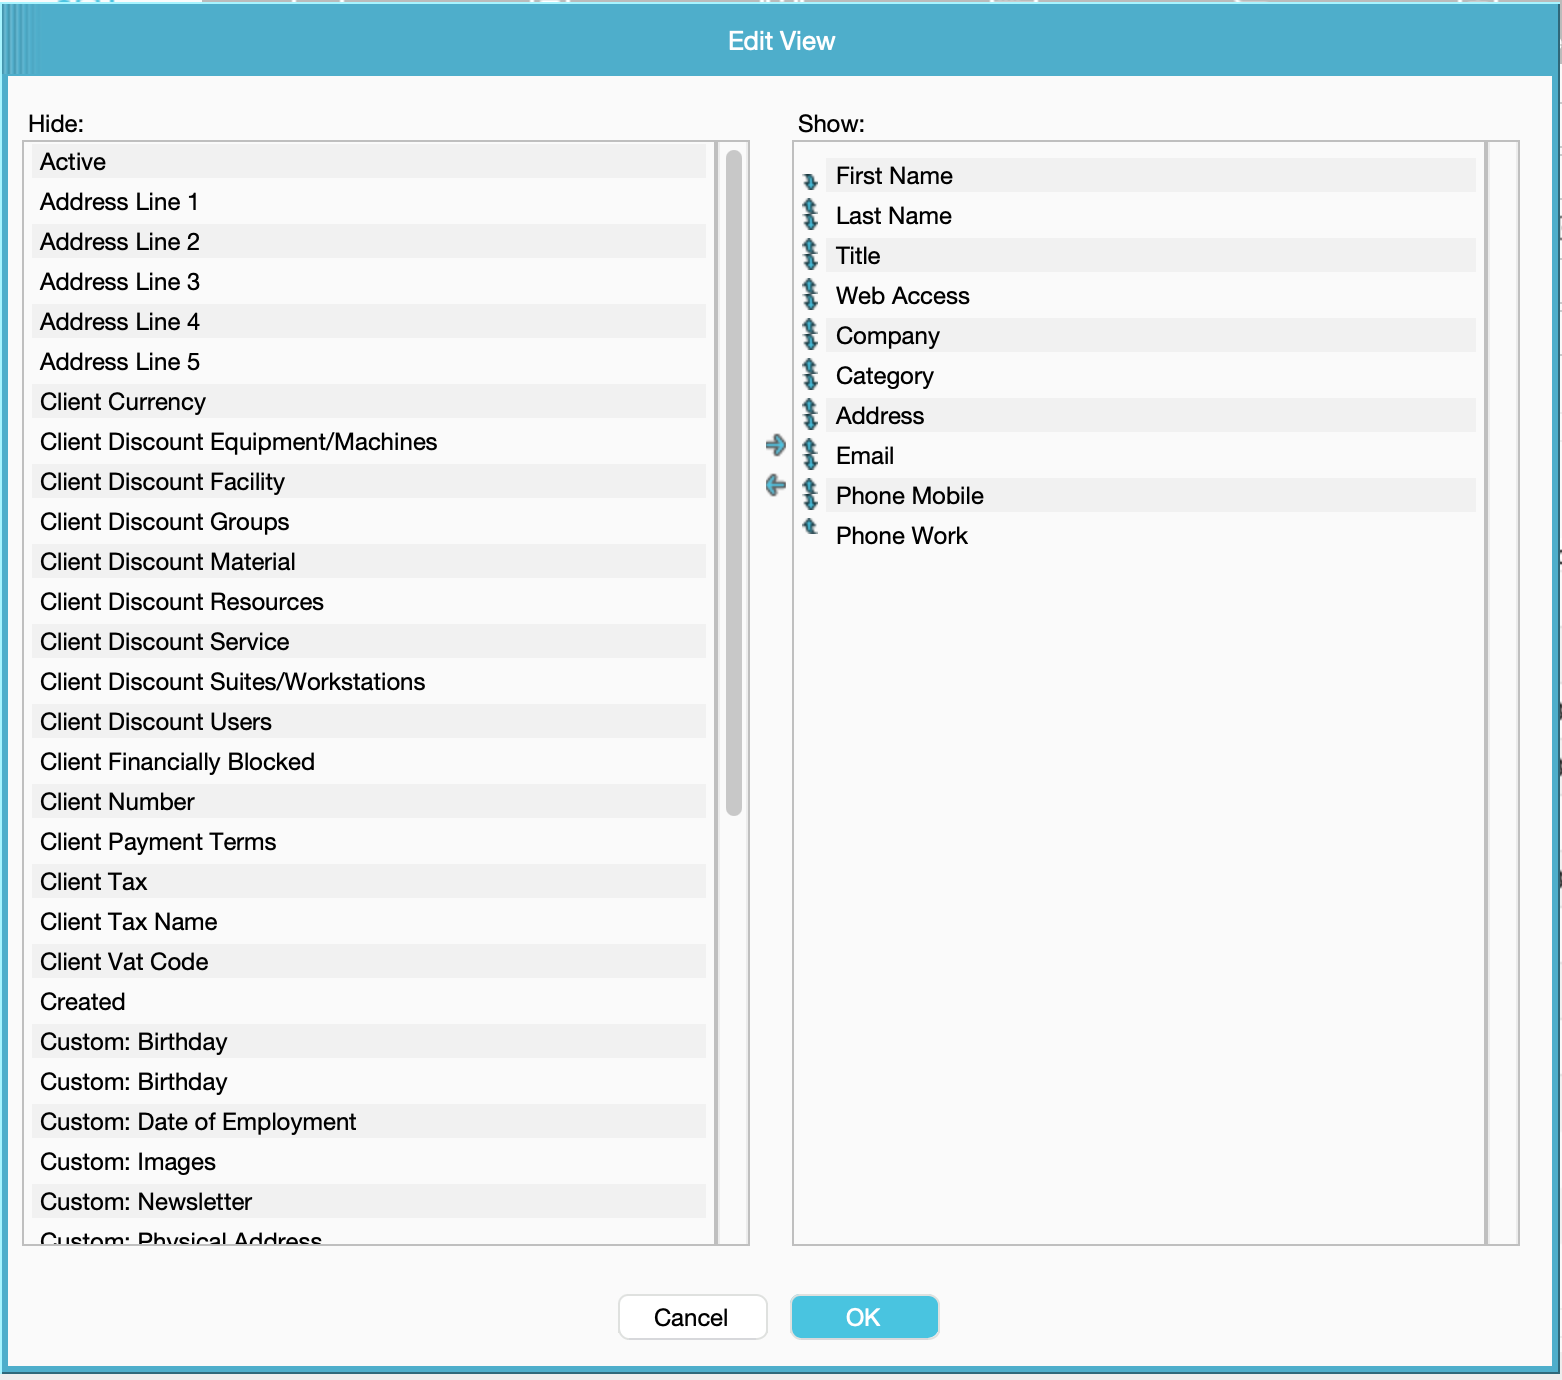
- Save View As - Allows you to save the configured order of Columns from your Edit View selection.
- Load View - Allows you to return to a saved configured view.
- Remove View - Allows you to remove a configured view.
- Maximum Hits When Searching - Allows you to alter any limitation on the number of results displayed in the Results Pane (similar to the yellow Caution triangle). The default amount for all user can be set by a Server admin on the Server Setup > General tab, under Hits Limit.
Reporting
Within the ACS you can use two different types of reports:
- Print Designer - Clicking the Printer icon to the right of the Clear button, will open up the Print Designer, to set up templates for Contact Reports.

- Export to CSV - Clicking the Share button on the bottom left corner of the Results Pane will allow you to export your results to CSV.
Was this article helpful?
That’s Great!
Thank you for your feedback
Sorry! We couldn't be helpful
Thank you for your feedback
Feedback sent
We appreciate your effort and will try to fix the article