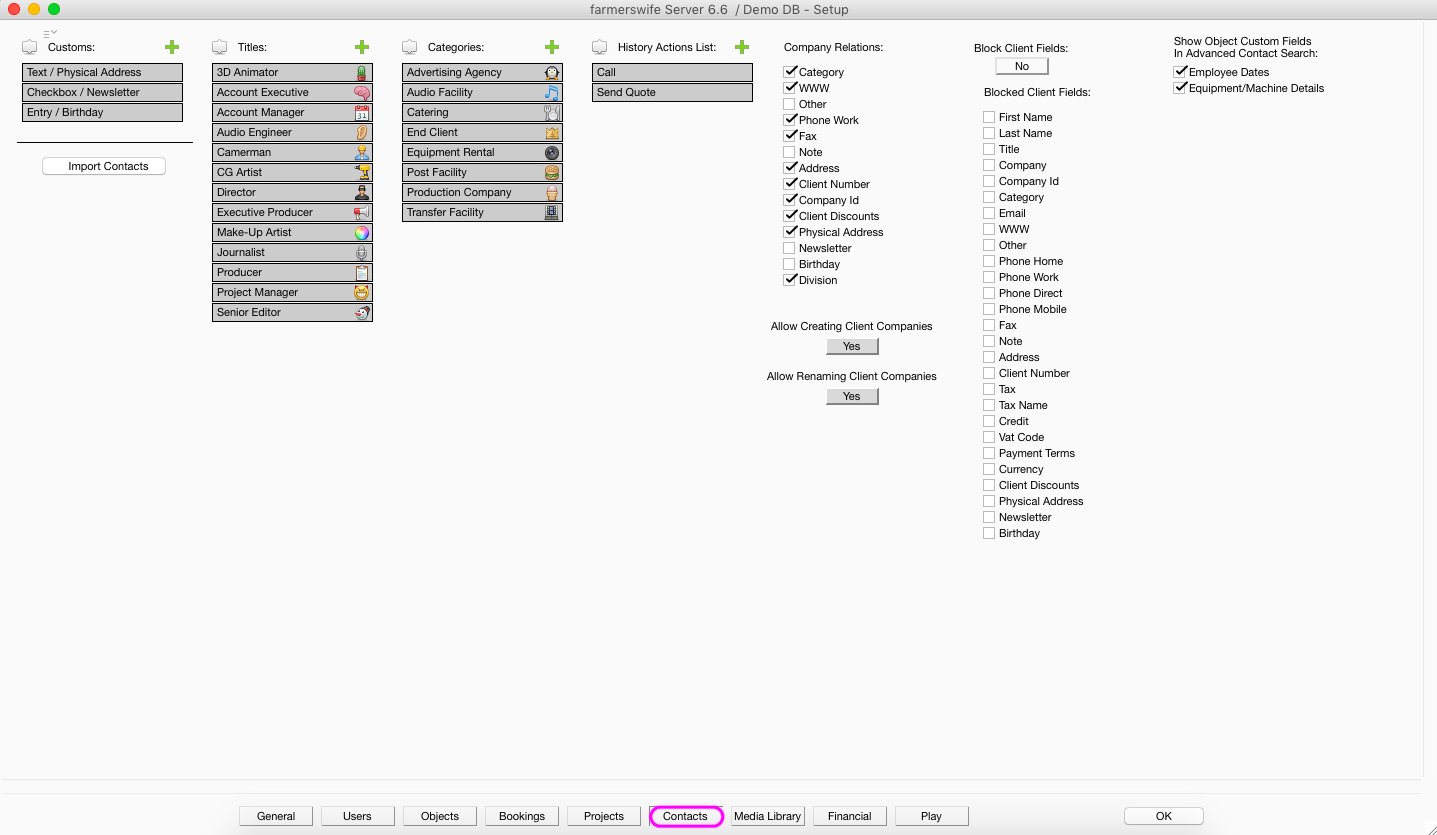
Titles
Click on the green plus icon and Add New Title for Contacts, such as Producer, Director, etc. These pre-defined Titles will appear as a drop-down list upon clicking in the Title field of a Contact. To apply an icon, click on the square button and select one. To delete an item from the list drag and drop it into the wastebasket. Once done, the list of Titles can be alphabetically sorted by clicking on the white icon to the left of Titles. To sort the list manually, drag an item over another one and drop before or after as indicated by the up/down arrows.
Categories
Click on the green plus icon to define different types of Company Categories such as Production Company, Agency, etc. They appear as options to choose from in the Category field of a Contact. To apply an icon, simply click on the square button and select one. To delete a Category simply drag and drop it into the wastebasket. Once done, the list can be alphabetically sorted by clicking on the white icon to the left of Categories. To sort the list manually, drag an item over another one and drop before or after as indicated by the up/down arrows.
History Actions List
Click on the green plus icon to define to-do's that can be applied to a Contact and assigned to other Users. These pre-defined actions will appear as a drop-down list in the Header of a new Todo in the Contact window, as well as in the Activity window in the Contact window. For more details refer to the Contacts chapter in the Toolbox Manual. Click on the square button to select an Icon that can be seen in the History of the Contact. Press the Sort button to sort the list alphabetically. To delete an Action simply drag and drop it into the wastebasket. Once done, the list can be alphabetically sorted by clicking on the white icon to the left of History Actions List. To sort the list manually, drag an item over another one and drop before or after as indicated by the up/ down arrows.
Company Relations
Select those labels that are to be shared by Contacts belonging to the same Company. When a new Contact is created and associated with a Company, those fields that have been set as company related will be automatically filled in with the information already existing in another Contact for this Company.
Block Client Fields
This setting is usually used in combination with 3rd-party software integration where Contacts are imported in farmers wife. For further information on this option please contact our Support team. If set to Yes, the selected fields will be blocked for editing after a Contact has been created and set to Type = Client. Also it is no longer possible to change the Type of the Contact.
Allow Creating Client Companies
This option is usually used in combination with 3rd-party software integration where Contacts are imported in farmers wife. For further information on this option please contact our Support team. This setting is by default set to "Yes". If set to No, then Users cannot create new Companies of type "Client". But they can still create new Companies under Globals, Resources and Privates.
Allow Renaming Client Companies
This option is usually used in combination with 3rd-party software integration where Contacts are imported in farmerswife. For further information on this option please contact our Support team. This setting is by default set to "Yes". If set to No, then Users cannot rename Companies of type "Client". They can still rename Companies under Globals, Resources and Privates.
Show Object Custom Fields
In Advanced Contact Search Object Custom Fields can also be applied to Contacts. These can be made available for search under the Advanced Contact Search if the template they belong to is activated here.
Was this article helpful?
That’s Great!
Thank you for your feedback
Sorry! We couldn't be helpful
Thank you for your feedback
Feedback sent
We appreciate your effort and will try to fix the article