How to send and later accept/decline requests
This articles explains how a User (Web and Advanced) can send a Request for time off (Vacation, Sick, Free Day etc.) to a User who has the Permission to receive Requests. Users who are allowed to accept/decline can check the Personnel Numbers and then accept and book the Request as Vacation etc. or decline.
Step-by-Step instructions
1. Setup Request types
- Go to Toolbox > "Settings" tab
- Select "Booking Defaults" on the bottom menu
- Click on "Task/Request Setup".
- A new window will open.
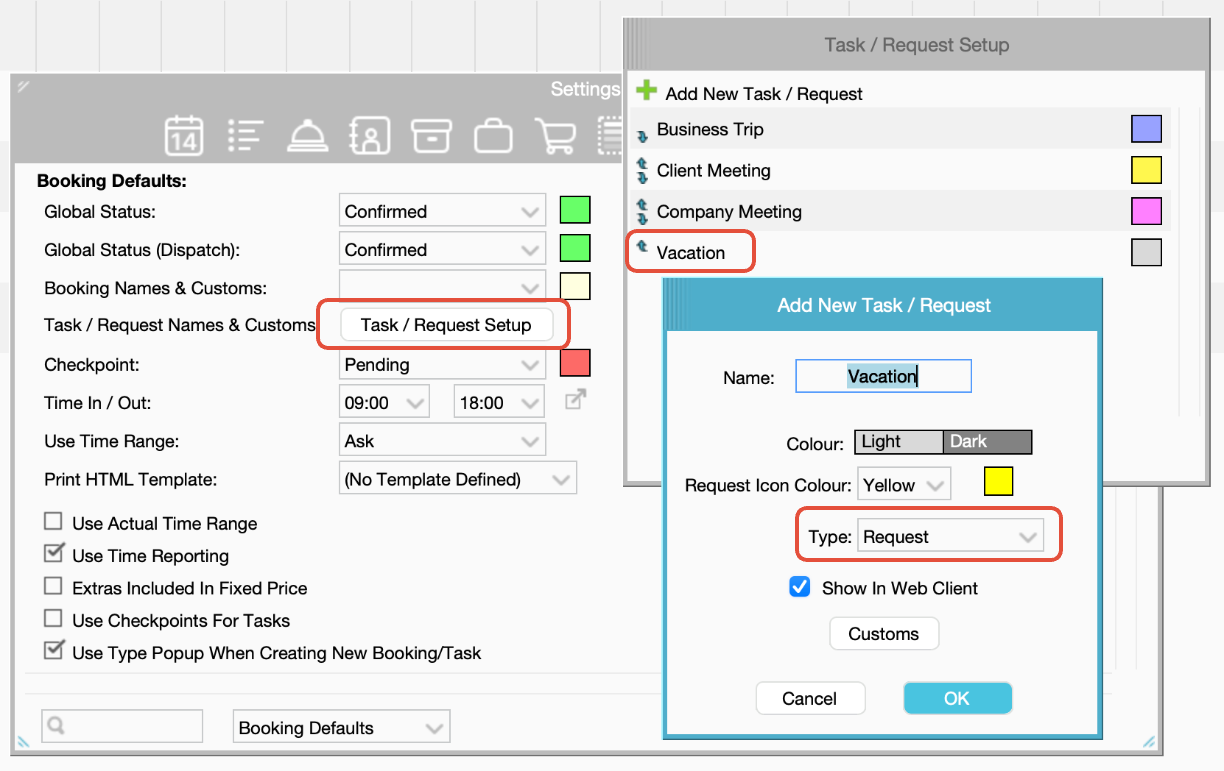
- Click green plus symbol to create a new request type.
- Name: type the name which should be shown in the request/task list
- Colour: pick the colour in which the Task booking shows in the Desktop/Web
- Request Icon Colour: select the colour of your Request Icon (the triangle):
- yellow (default),
- pink and
- blue.
This is visible in the Long Form > Personnel and Timeline Tree and also in the Toolbox > Requests tab.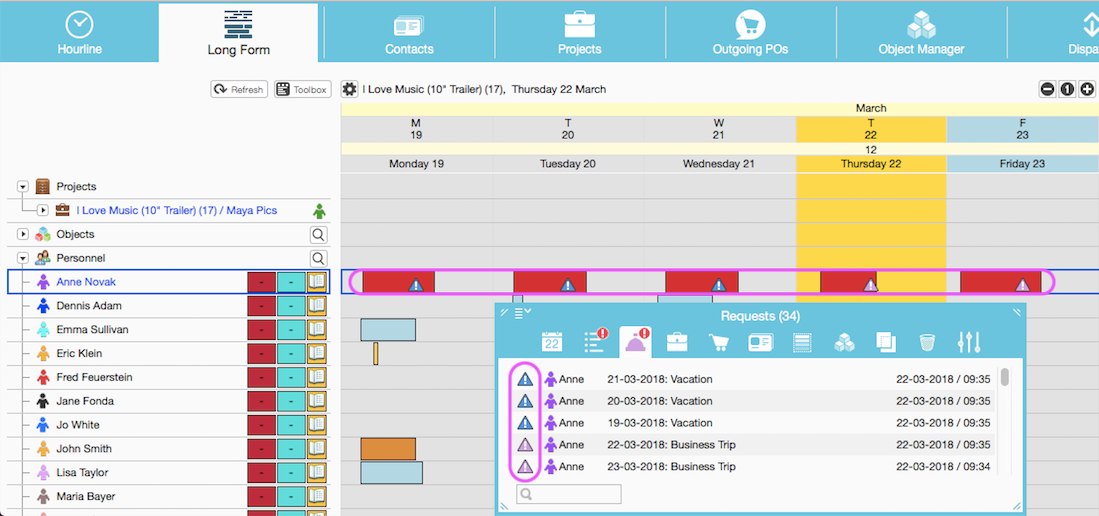
- Type: Request to ONLY see the Request in the Tasks list
- Show In Web Client: decide whether this type should be seen from the Web Client or not.
- Customs - only applicable to Task Bookings.
To add Custom fields to Requests, they have to be added through the Server Setup.
Note: Request Custom Fields are only accessible thorugh the Desktop app but not through the Web Client or mobile apps.
2. Configure User Permissions
- Go to the Object Manager
- Double click the user to edit the Permission Profile

- Advanced Users: open the menu located on the right side of the "Permissions Profile":
- Click Edit to open the Permissions window
- Make sure that the user is under the "Task/ Bookings/ Rates" Permission type on the menu on the top of the window.
- Scroll down until you find "Edit Personnel Management", "Receive Request", "Can Send Request".
- Depending on the User Role, either tick "Edit Personnel Management", "Receive Request", "Can Send Request" or
- Create a separate Profile and only tick "Can Send Request" if the user should not be able to receive requests.

Web Users: open the menu located on the right side of the "Permissions Profile"
Click on "Web Profile Manager" an in the set up window locate "Can Create Requests" and select YES.
- Show Request Recipient Users List (optional)
- Send Email To User When Request Status Changes (optional)
- User Must Select Request Type (optional): A pre-populated list of Requests can be created for the requester to pick from.
- User Can Modify Approved Requests (optional)

3. Configure Settings for Users to Receive Requests
- Go to Toolbox > Settings
- In the bottom menu scroll down and select "Miscellaneous".
- Click "Toolbox Menus" button.
- Click to move the “Requests” option to the right side so you can access it on the Toolbox Menu.

- In the bottom menu scroll down and select "Personnel Tree".
- Tick "Requests" to be able to see the triangle in the Long Form Personnel tree.

- Go to the new "Requests" Tab in the Toolbox, open the menu and select "Show only pending".

Request Workflow
Requests can be created through the farmerswife desktop client or via the web or the iOS.
They can only be made on the own User.
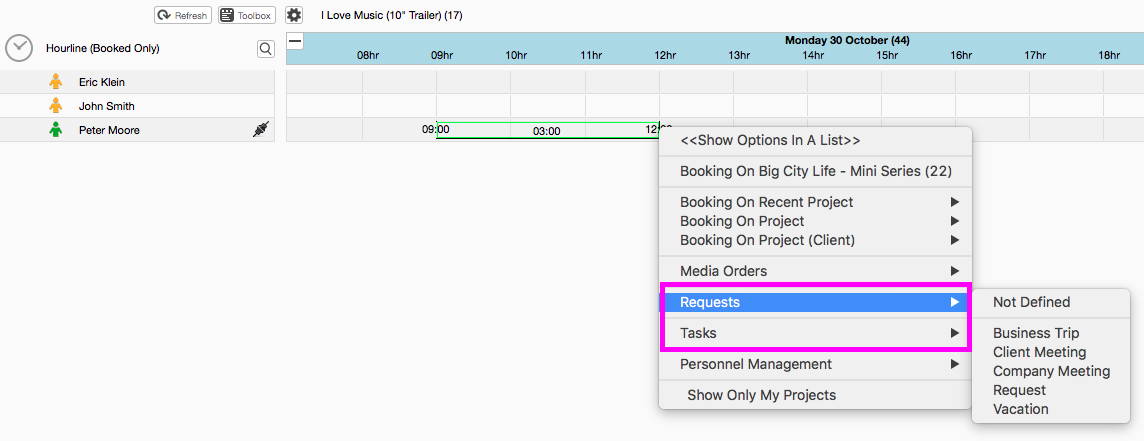
Create a Request
To create a Request the User must make a Booking on their own timeline > Select Request Type from the list > Select Who to Send the Request to > Confirm the Time In/Out.
Receive Requests
The User who receive Requests will see it in the Toolbox > Requests window
All Requests will appear on the list with a Yellow Triangle for Pending, Green for Accepted and Red for Declined. The Requests will also appear with a little yellow, green or red triangle in the Long Form timeline in the Personnel Tree.

Accept/Decline Requests
When a Request is received the User can Decline or Accept it. Accepting a Request can also be done by using the options ‘Accept and Book to Project’ or ‘Accept and Booking To Personnel’. This can be configured in the Toolbox.

These two options will accept the Request and create a new Project or Personnel Booking additional to the Request, which leaves a history trail of when the Request was made and what subsequently happened to it and when.
Related articles
Was this article helpful?
That’s Great!
Thank you for your feedback
Sorry! We couldn't be helpful
Thank you for your feedback
Feedback sent
We appreciate your effort and will try to fix the article